

 Set up docs MCP
MySQL ClickPipe를 통해 데이터를 복제할 수 있도록 RDS MariaDB 인스턴스를 구성하는 방법을 단계별로 안내합니다.
바이너리 로그 보존 활성화
바이너리 로그는 MySQL 서버 인스턴스에서 수행된 데이터 변경에 대한 정보를 포함하는 로그 파일 집합입니다. 바이너리 로그 파일은 복제에 필요합니다. 아래의 두 단계를 모두 따라야 합니다.
자동 백업을 통해 바이너리 로깅 활성화
자동 백업 기능에 따라 MySQL의 바이너리 로깅 활성화 여부가 결정됩니다. 이 설정은 AWS 콘솔에서 구성할 수 있습니다.

복제 사용 사례에 따라 백업 보존을 충분히 긴 값으로 설정하는 것이 좋습니다.
Binlog 보존 시간
Amazon RDS for MariaDB에서는 변경 내용이 포함된 binlog 파일을 얼마 동안 보관할지 나타내는 binlog 보존 기간을 다른 방식으로 설정합니다. binlog 파일이 삭제되기 전에 일부 변경 내용을 읽지 못하면 복제를 계속할 수 없습니다. binlog 보존 시간의 기본값은 NULL이며, 이는 바이너리 로그가 보존되지 않음을 의미합니다.
DB 인스턴스에서 바이너리 로그를 보존할 시간을 지정하려면, 복제가 수행될 수 있을 만큼 충분히 긴 binlog 보존 주기로 mysql.rds_set_configuration 함수를 사용하십시오. 권장되는 최소값은 24 hours입니다.
mysql=> call mysql.rds_set_configuration('binlog retention hours', 24);파라미터 그룹에서 binlog 설정 구성
RDS Console에서 MariaDB 인스턴스를 클릭한 다음 Configurations 탭으로 이동하면 파라미터 그룹을 찾을 수 있습니다.
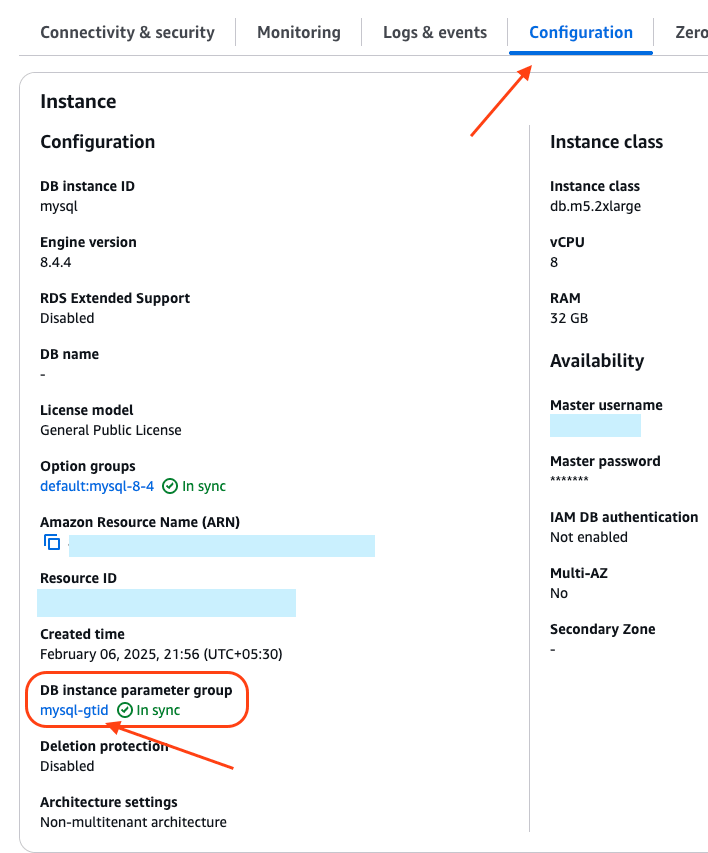
파라미터 그룹 링크를 클릭하면 해당 파라미터 그룹 페이지로 이동합니다. 오른쪽 상단에 Edit 버튼이 표시됩니다:

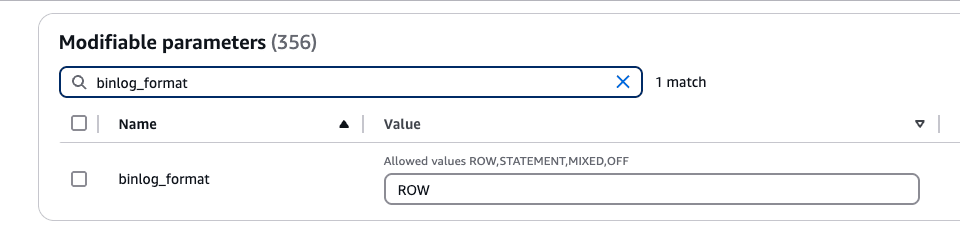
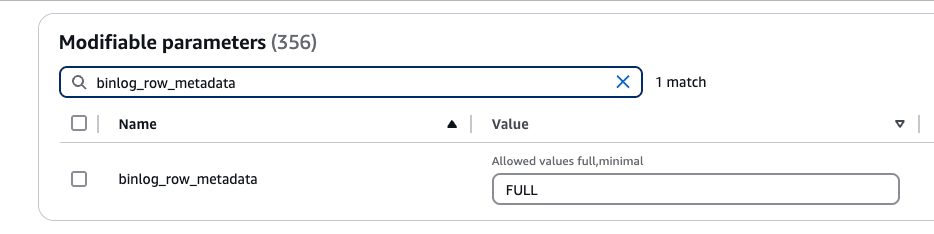
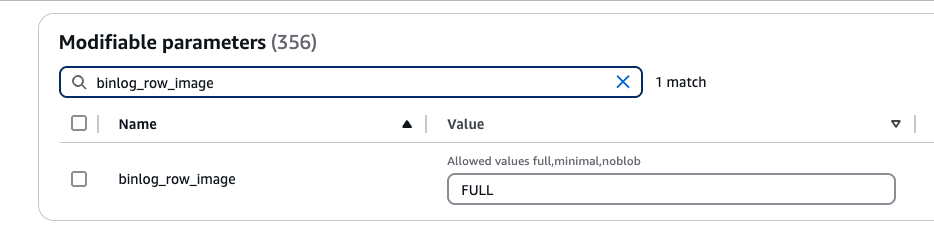
설정 binlog_format, binlog_row_metadata, binlog_row_image는 다음과 같이 지정해야 합니다:
binlog_format을ROW로 설정합니다.
binlog_row_metadata를FULL로 설정합니다
binlog_row_image를FULL로 설정합니다
다음으로, 오른쪽 상단의 Save Changes를 클릭합니다. 변경 사항을 적용하려면 인스턴스를 재부팅해야 할 수 있습니다. RDS 인스턴스의 Configurations 탭에서 파라미터 그룹 링크 옆에 Pending reboot가 표시되면, 인스턴스를 재부팅해야 한다는 뜻입니다.
GTID 모드 활성화
전역 트랜잭션 식별자(GTID)는 MySQL/MariaDB에서 커밋된 각 트랜잭션에 할당되는 고유 ID입니다. GTID를 사용하면 binlog 복제가 간소화되고 문제 해결도 더 쉬워집니다. MariaDB에서는 GTID 모드가 기본적으로 활성화되어 있으므로, 이를 사용하기 위해 별도의 작업을 수행할 필요가 없습니다.
데이터베이스 사용자 구성
관리자 권한이 있는 사용자로 RDS MariaDB 인스턴스에 연결한 다음, 다음 명령을 실행하십시오:
-
ClickPipes 전용 사용자를 생성합니다:
CREATE USER 'clickpipes_user'@'host' IDENTIFIED BY 'some-password'; -
스키마 권한을 부여합니다. 다음 예시는
mysql데이터베이스에 대한 권한을 보여줍니다. 복제하려는 각 데이터베이스와 호스트에 대해 이 명령을 반복하십시오:GRANT SELECT ON `mysql`.* TO 'clickpipes_user'@'host'; -
사용자에게 복제 권한을 부여합니다:
GRANT REPLICATION CLIENT ON *.* TO 'clickpipes_user'@'%';
GRANT REPLICATION SLAVE ON *.* TO 'clickpipes_user'@'%';
IAM authentication 사용하기(선택 사항)
Instead of a password, you can authenticate the ClickPipes user with an AWS IAM role. This lets ClickPipes connect to your Amazon RDS instance without storing database credentials.
Enable IAM authentication
- Log in to your AWS account and go to the RDS instance you want to configure.
- Click Modify.
- Scroll to the Database authentication section.
- Select Password and IAM database authentication.
- Click Continue.
- Review the changes and select Apply immediately.
Create the ClickPipes user
Create the ClickPipes user with IAM authentication enabled, then grant it the same schema and replication privileges shown above:
CREATE USER 'clickpipes_iam_user' IDENTIFIED WITH AWSAuthenticationPlugin AS 'RDS';Obtain the ClickHouse service IAM role ARN
- Log in to your ClickHouse Cloud account.
- Select the ClickHouse service you want to connect.
- Select the Settings tab.
- Scroll to the Network security information section at the bottom of the page.
- Copy the service's Service role ID (IAM) value, shown below.
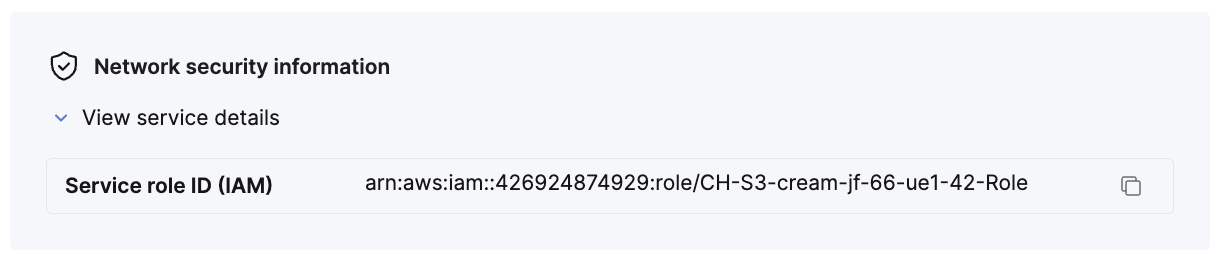
This value is your {ClickHouse_IAM_ARN} — the role ClickPipes uses to access your RDS instance.
Obtain the resource ID
- Log in to your AWS account and go to the RDS instance you want to configure.
- Select the Configuration tab.
- Note the Resource ID value — it looks like
db-xxxxxxxxxxxxxx. This is your{RDS_RESOURCE_ID}, which you reference in the permissions policy.
Create the IAM role
- Log in to your AWS account with an IAM user that has permission to create and manage IAM roles.
- Open the IAM console.
- Create a new IAM role with the following trust and permissions policies.
Trust policy (replace
{ClickHouse_IAM_ARN}with the IAM role ARN of your ClickHouse instance):{ "Version": "2012-10-17", "Statement": [ { "Effect": "Allow", "Principal": { "AWS": "{ClickHouse_IAM_ARN}" }, "Action": [ "sts:AssumeRole", "sts:TagSession" ] } ] }Permissions policy (replace
{RDS_RESOURCE_ID}with the resource ID of your RDS instance,{RDS_REGION}with its region, and{AWS_ACCOUNT}with your AWS account ID):{ "Version": "2012-10-17", "Statement": [ { "Effect": "Allow", "Action": [ "rds-db:connect" ], "Resource": [ "arn:aws:rds-db:{RDS_REGION}:{AWS_ACCOUNT}:dbuser:{RDS_RESOURCE_ID}/clickpipes_iam_user" ] } ] } - Once the role is created, copy its ARN. This is your
{RDS_ACCESS_IAM_ROLE_ARN}.
You can now use this IAM role to authenticate with your RDS instance from ClickPipes.
네트워크 액세스 구성
IP 기반 액세스 제어
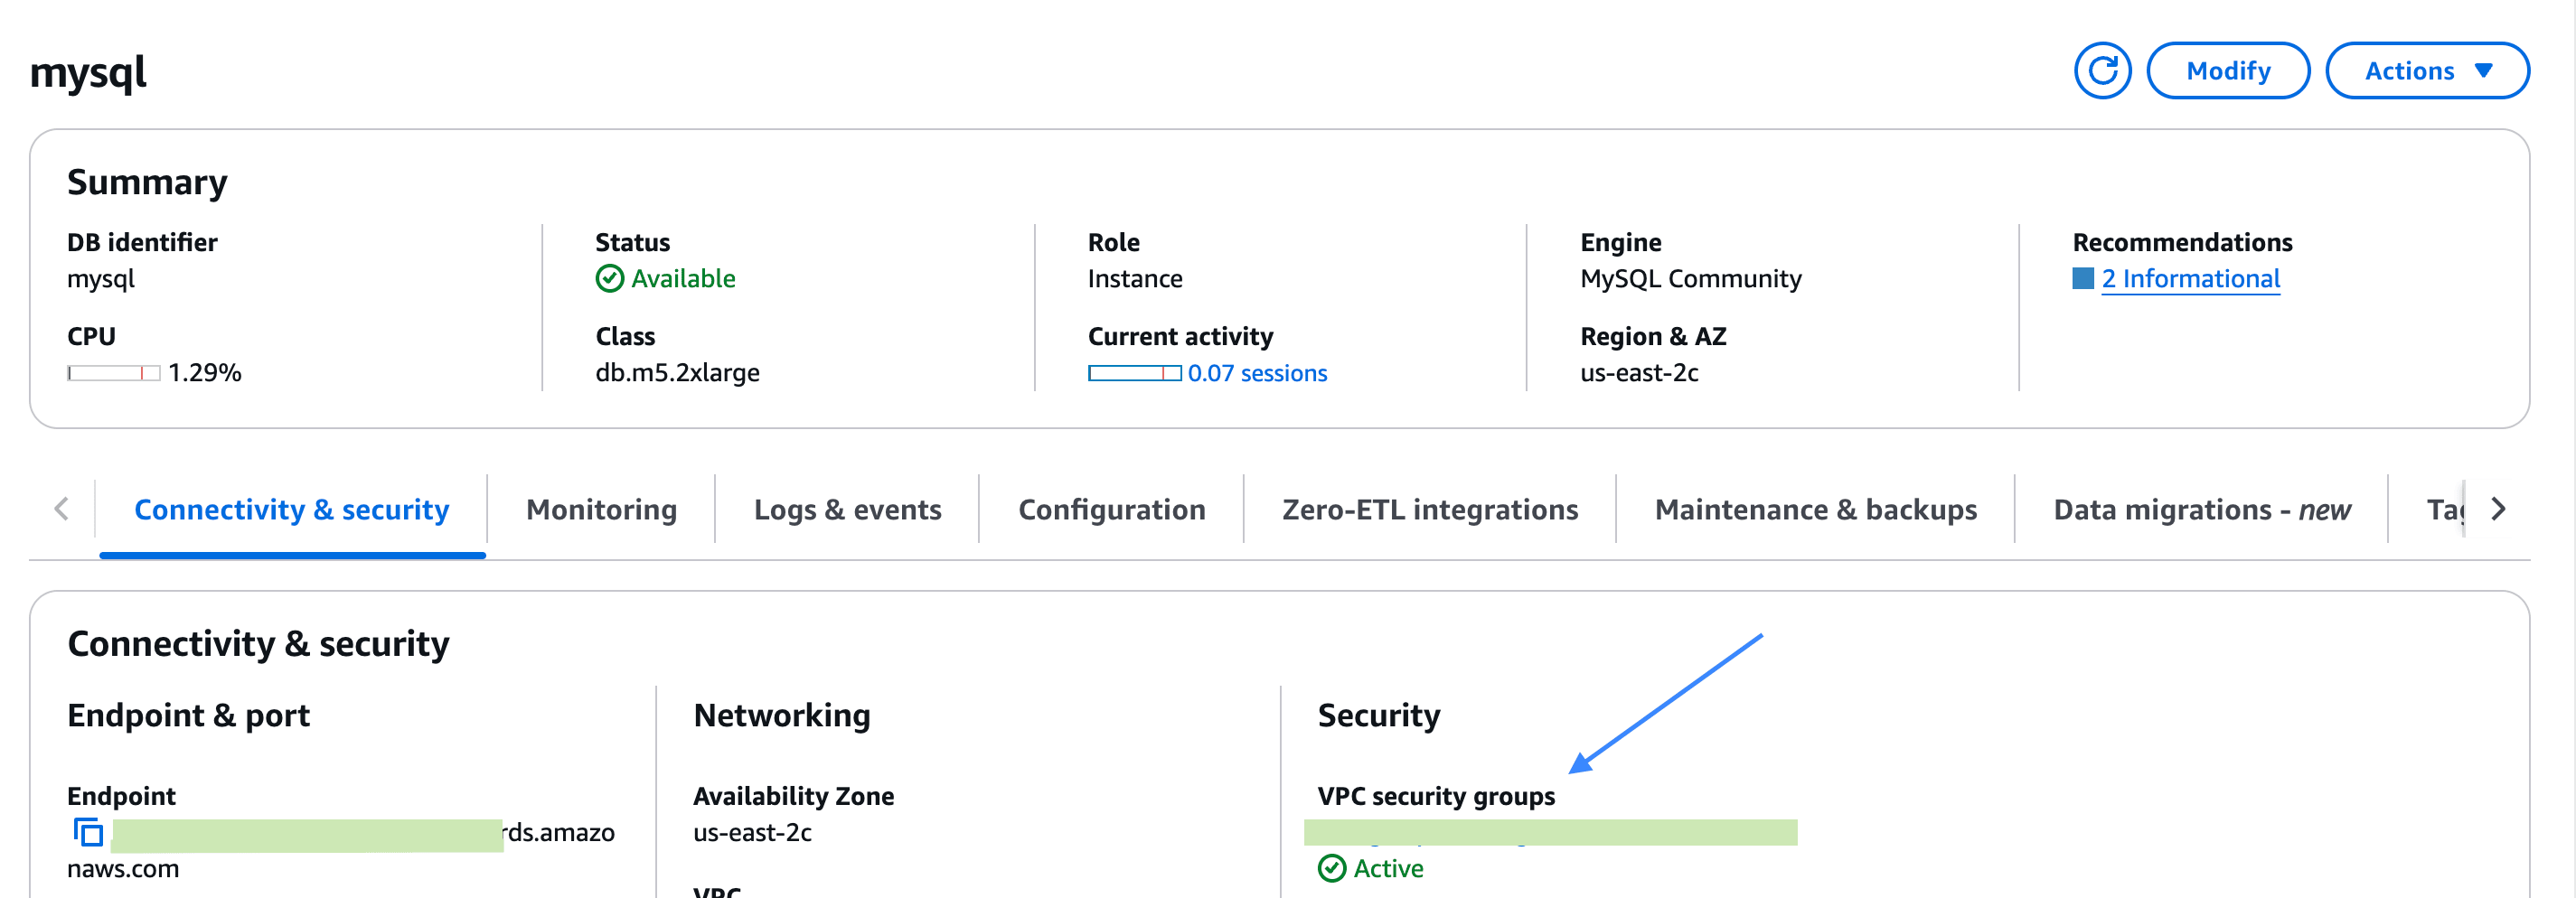
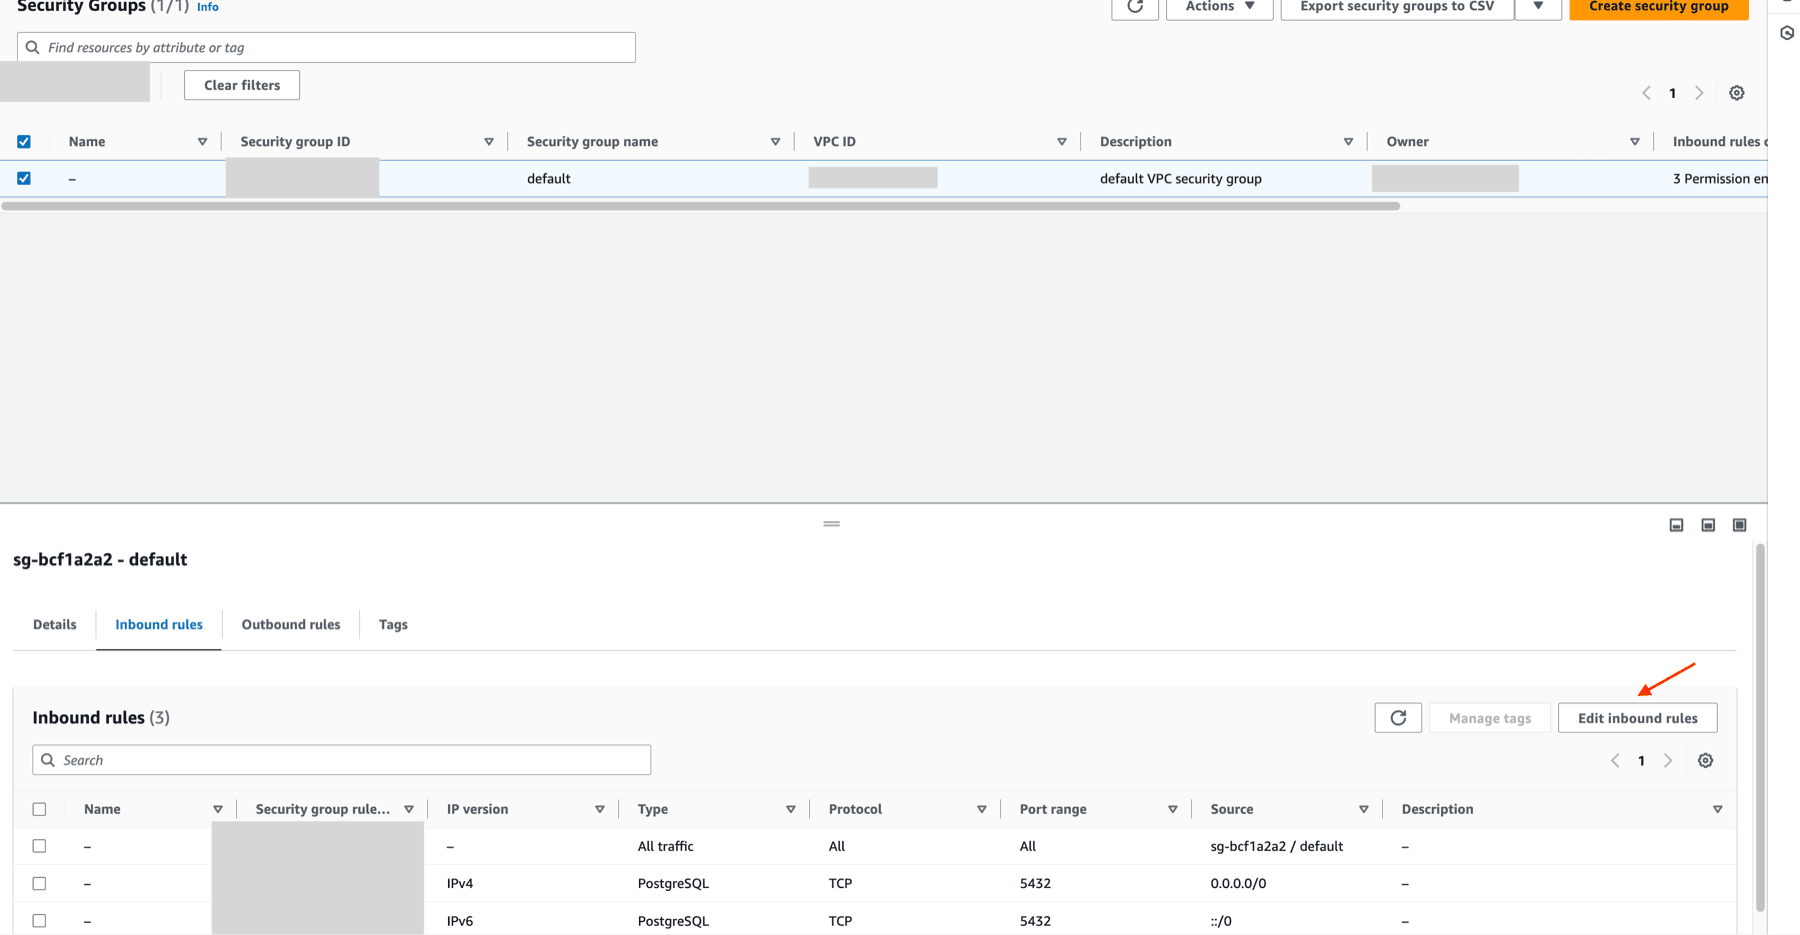
RDS 인스턴스로의 트래픽을 제한하려면 문서에 안내된 정적 NAT IP 주소를 RDS 보안 그룹의 인바운드 규칙에 추가하십시오.
AWS PrivateLink를 통한 프라이빗 액세스
프라이빗 네트워크를 통해 RDS 인스턴스에 연결하려면 AWS PrivateLink를 사용할 수 있습니다. 연결을 설정하려면 ClickPipes용 AWS PrivateLink 설정 가이드를 따르십시오.