

 Set up docs MCP
这是一份分步指南,说明如何配置您的 RDS MariaDB 实例,以便通过 MySQL ClickPipe 复制其中的数据。
启用二进制日志保留
二进制日志是一组日志文件,其中包含对 MySQL 服务器实例所做的数据修改信息。复制需要二进制日志文件。必须同时执行以下两个步骤:
通过自动备份启用二进制日志记录
MySQL 是否启用二进制日志记录由自动备份功能决定。可以在 AWS Console 中进行设置:

建议根据复制用例将备份保留策略设置为足够长的时长。
Binlog 保留时长 (小时)
Amazon RDS for MariaDB 设置 binlog 保留时长的方法有所不同。binlog 保留时长是指包含变更的二进制日志文件会保留多久。如果某些变更在 binlog 文件被删除前尚未被读取,复制将无法继续。binlog 保留时长 (小时) 的默认值为 NULL,表示不会保留二进制日志。
要指定某个 DB 实例上二进制日志的保留小时数,请使用 mysql.rds_set_configuration 函数,并将 binlog 保留周期设置得足够长,以确保复制能够进行。建议的最短时长为 24 hours。
mysql=> call mysql.rds_set_configuration('binlog retention hours', 24);在参数组中配置 binlog 设置
在 RDS 控制台中点击你的 MariaDB 实例,然后进入 Configurations 选项卡,即可找到参数组。
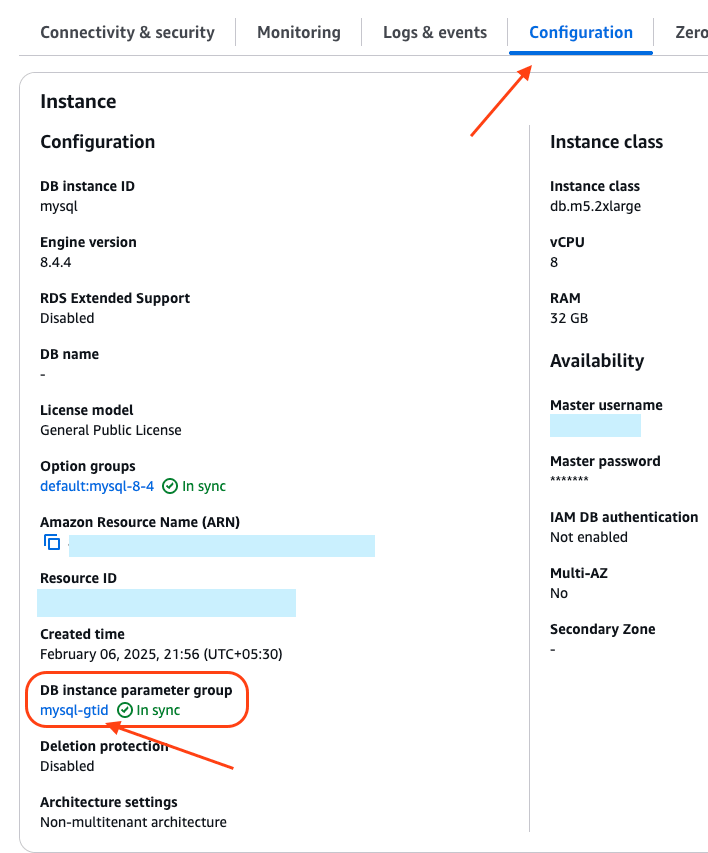
点击参数组链接后,会进入其详情页面。你会在右上角看到一个 Edit 按钮:

需要按如下方式设置 binlog_format、binlog_row_metadata 和 binlog_row_image:
- 将
binlog_format设置为ROW。
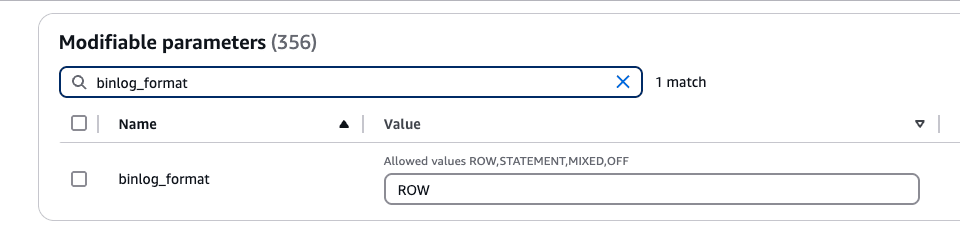
- 将
binlog_row_metadata设置为FULL
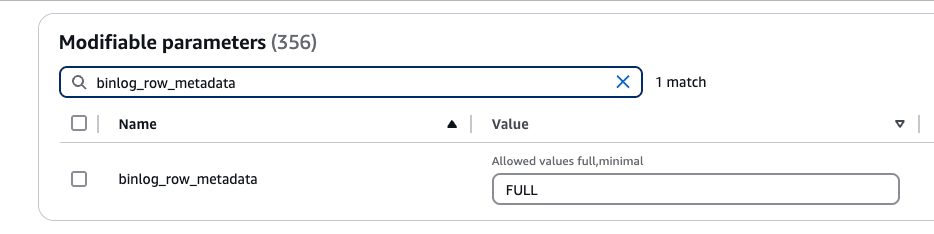
- 将
binlog_row_image设置为FULL
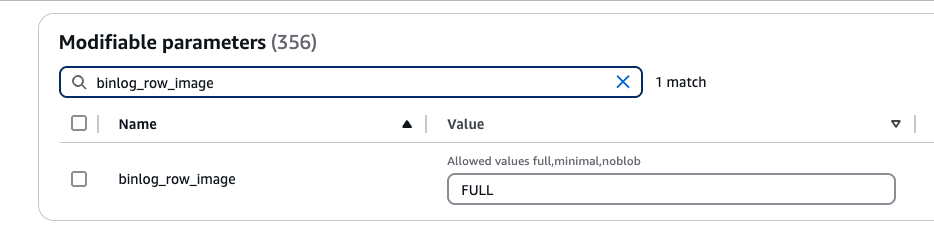
接下来,点击右上角的 Save Changes。这些更改可能需要重启实例后才会生效。如果你在 RDS 实例的 Configurations 选项卡中看到参数组链接旁显示 Pending reboot,通常就表示需要重启实例。
启用 GTID 模式
全局事务标识符 (GTID) 是分配给 MySQL/MariaDB 中每个已提交事务的唯一 ID。它可以简化 binlog 复制,并让故障排查更直接。MariaDB 默认启用 GTID 模式,因此无需用户执行任何操作即可使用。
配置数据库用户
以管理员用户身份连接到您的 RDS MariaDB 实例,并执行以下命令:
-
为 ClickPipes 创建一个专用用户:
CREATE USER 'clickpipes_user'@'host' IDENTIFIED BY 'some-password'; -
授予 schema 权限。以下示例展示了
mysqldatabase 的权限。对于您要复制的每个 database 和主机,请重复执行这些命令:GRANT SELECT ON `mysql`.* TO 'clickpipes_user'@'host'; -
向该用户授予复制权限:
GRANT REPLICATION CLIENT ON *.* TO 'clickpipes_user'@'%';
GRANT REPLICATION SLAVE ON *.* TO 'clickpipes_user'@'%';
使用 IAM 身份验证 (可选)
Instead of a password, you can authenticate the ClickPipes user with an AWS IAM role. This lets ClickPipes connect to your Amazon RDS instance without storing database credentials.
Enable IAM authentication
- Log in to your AWS account and go to the RDS instance you want to configure.
- Click Modify.
- Scroll to the Database authentication section.
- Select Password and IAM database authentication.
- Click Continue.
- Review the changes and select Apply immediately.
Create the ClickPipes user
Create the ClickPipes user with IAM authentication enabled, then grant it the same schema and replication privileges shown above:
CREATE USER 'clickpipes_iam_user' IDENTIFIED WITH AWSAuthenticationPlugin AS 'RDS';Obtain the ClickHouse service IAM role ARN
- Log in to your ClickHouse Cloud account.
- Select the ClickHouse service you want to connect.
- Select the Settings tab.
- Scroll to the Network security information section at the bottom of the page.
- Copy the service's Service role ID (IAM) value, shown below.
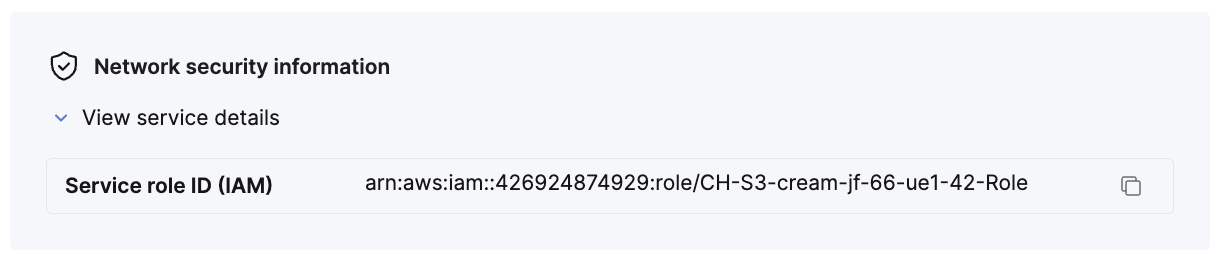
This value is your {ClickHouse_IAM_ARN} — the role ClickPipes uses to access your RDS instance.
Obtain the resource ID
- Log in to your AWS account and go to the RDS instance you want to configure.
- Select the Configuration tab.
- Note the Resource ID value — it looks like
db-xxxxxxxxxxxxxx. This is your{RDS_RESOURCE_ID}, which you reference in the permissions policy.
Create the IAM role
- Log in to your AWS account with an IAM user that has permission to create and manage IAM roles.
- Open the IAM console.
- Create a new IAM role with the following trust and permissions policies.
Trust policy (replace
{ClickHouse_IAM_ARN}with the IAM role ARN of your ClickHouse instance):{ "Version": "2012-10-17", "Statement": [ { "Effect": "Allow", "Principal": { "AWS": "{ClickHouse_IAM_ARN}" }, "Action": [ "sts:AssumeRole", "sts:TagSession" ] } ] }Permissions policy (replace
{RDS_RESOURCE_ID}with the resource ID of your RDS instance,{RDS_REGION}with its region, and{AWS_ACCOUNT}with your AWS account ID):{ "Version": "2012-10-17", "Statement": [ { "Effect": "Allow", "Action": [ "rds-db:connect" ], "Resource": [ "arn:aws:rds-db:{RDS_REGION}:{AWS_ACCOUNT}:dbuser:{RDS_RESOURCE_ID}/clickpipes_iam_user" ] } ] } - Once the role is created, copy its ARN. This is your
{RDS_ACCESS_IAM_ROLE_ARN}.
You can now use this IAM role to authenticate with your RDS instance from ClickPipes.
配置网络访问
基于 IP 的访问控制
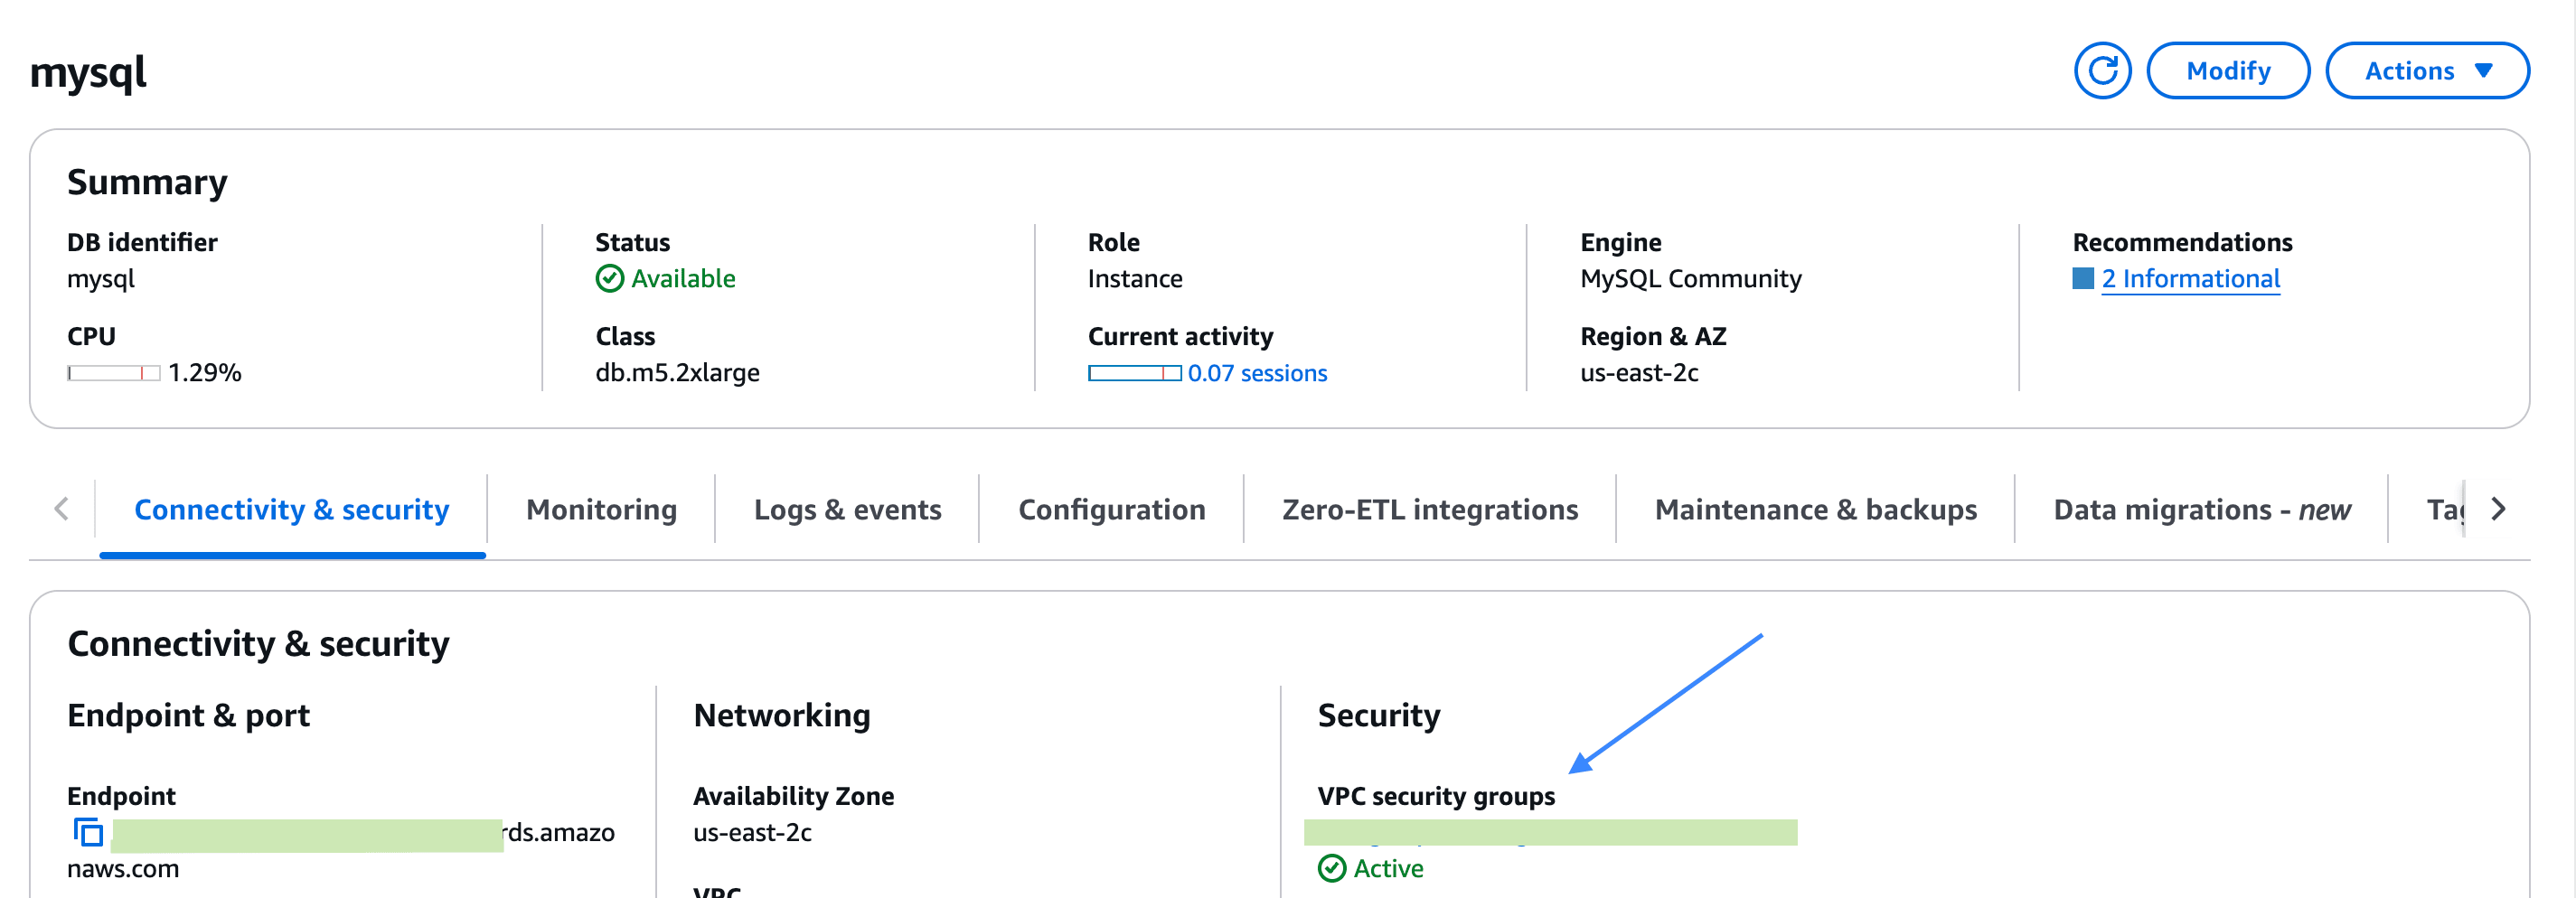
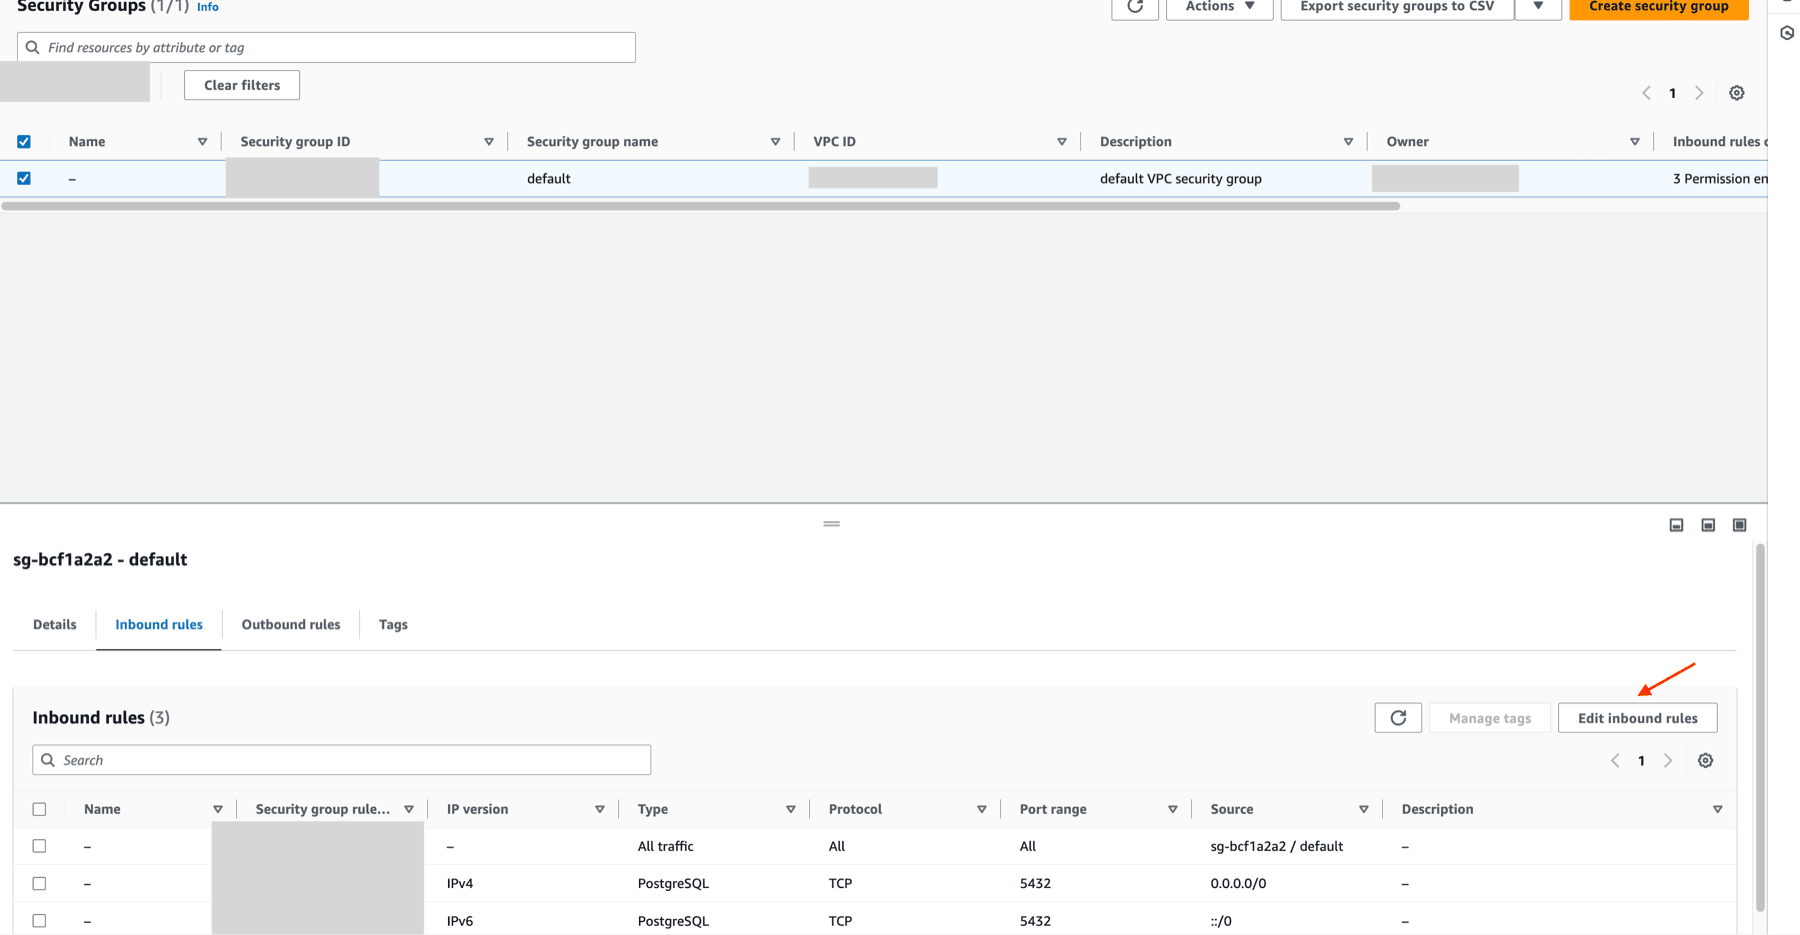
如果你想限制访问 RDS 实例的流量,请将文档中列出的静态 NAT IP 地址添加到 RDS 安全组 (Security Group) 的 Inbound rules 中。
通过 AWS PrivateLink 进行私网访问
要通过私网连接到您的 RDS 实例,您可以使用 AWS PrivateLink。请按照我们的 ClickPipes 的 AWS PrivateLink 设置指南 配置连接。