

 Set up docs MCP
サポートされている Postgres のバージョン
ClickPipes は、Aurora PostgreSQL-Compatible Edition バージョン 12 以降に対応しています。
論理レプリケーションを有効にする
Aurora インスタンスですでに以下の設定が有効になっている場合は、このセクションはスキップできます。
rds.logical_replication = 1
以前に別のデータレプリケーションツールを使用していた場合は、この設定があらかじめ構成されていることが一般的です。
postgres=> SHOW rds.logical_replication ;
 rds.logical_replication
-------------------------
 on
(1 row)
まだ設定していない場合は、以下の手順に従ってください。
- 必要な設定を含む、Aurora PostgreSQL のバージョンに対応した新しいパラメータグループを作成します。
rds.logical_replicationを 1 に設定します
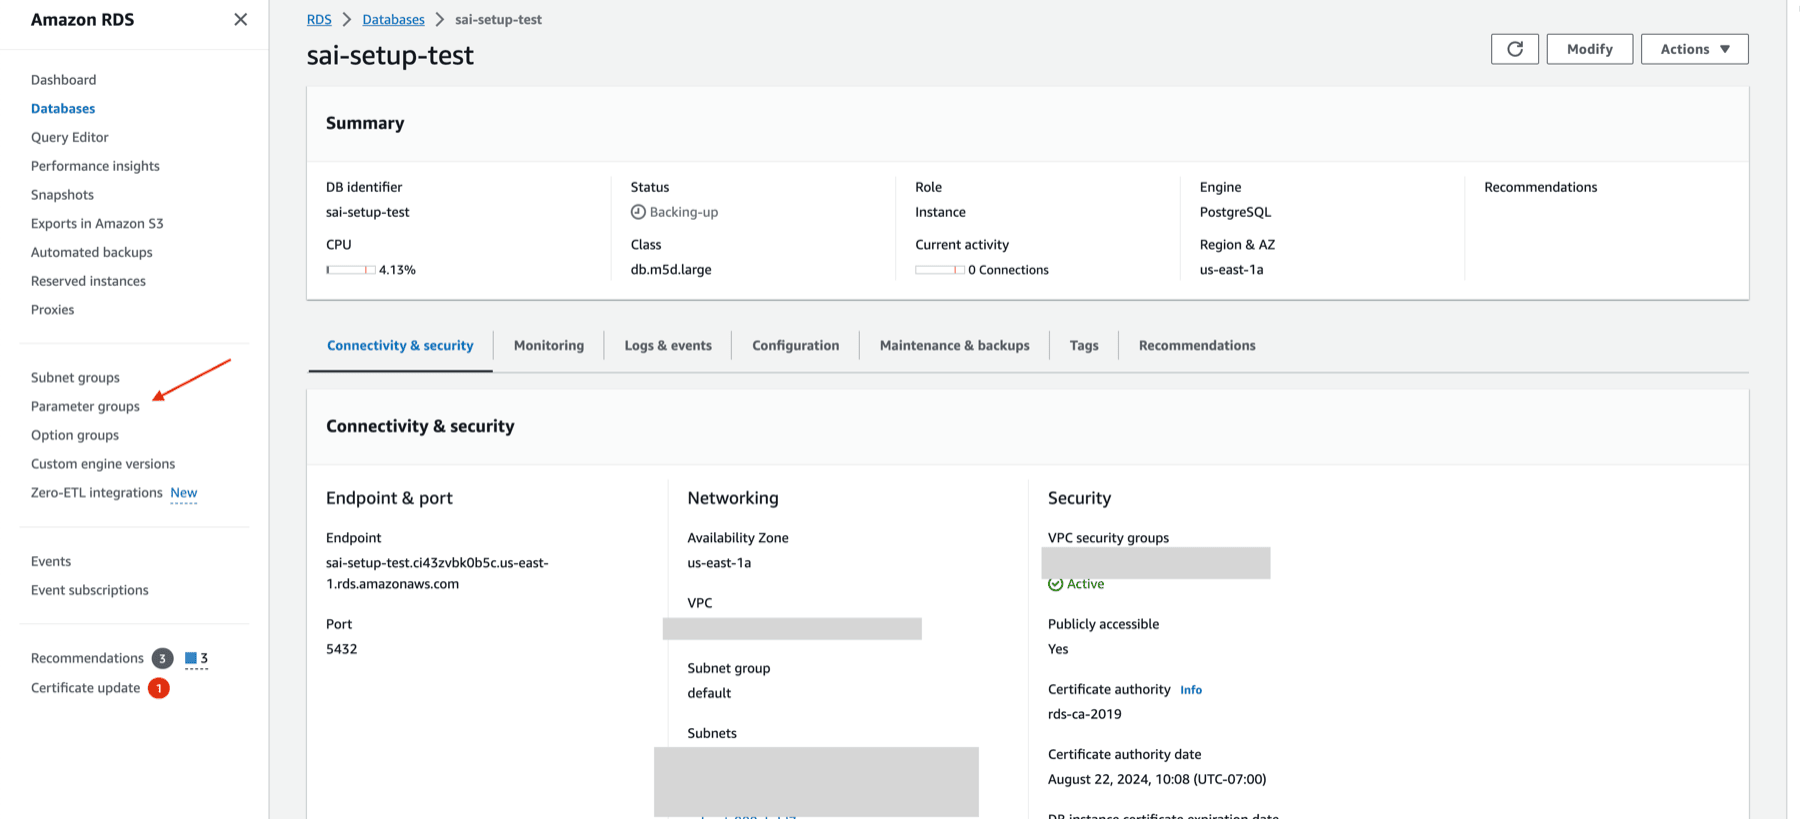
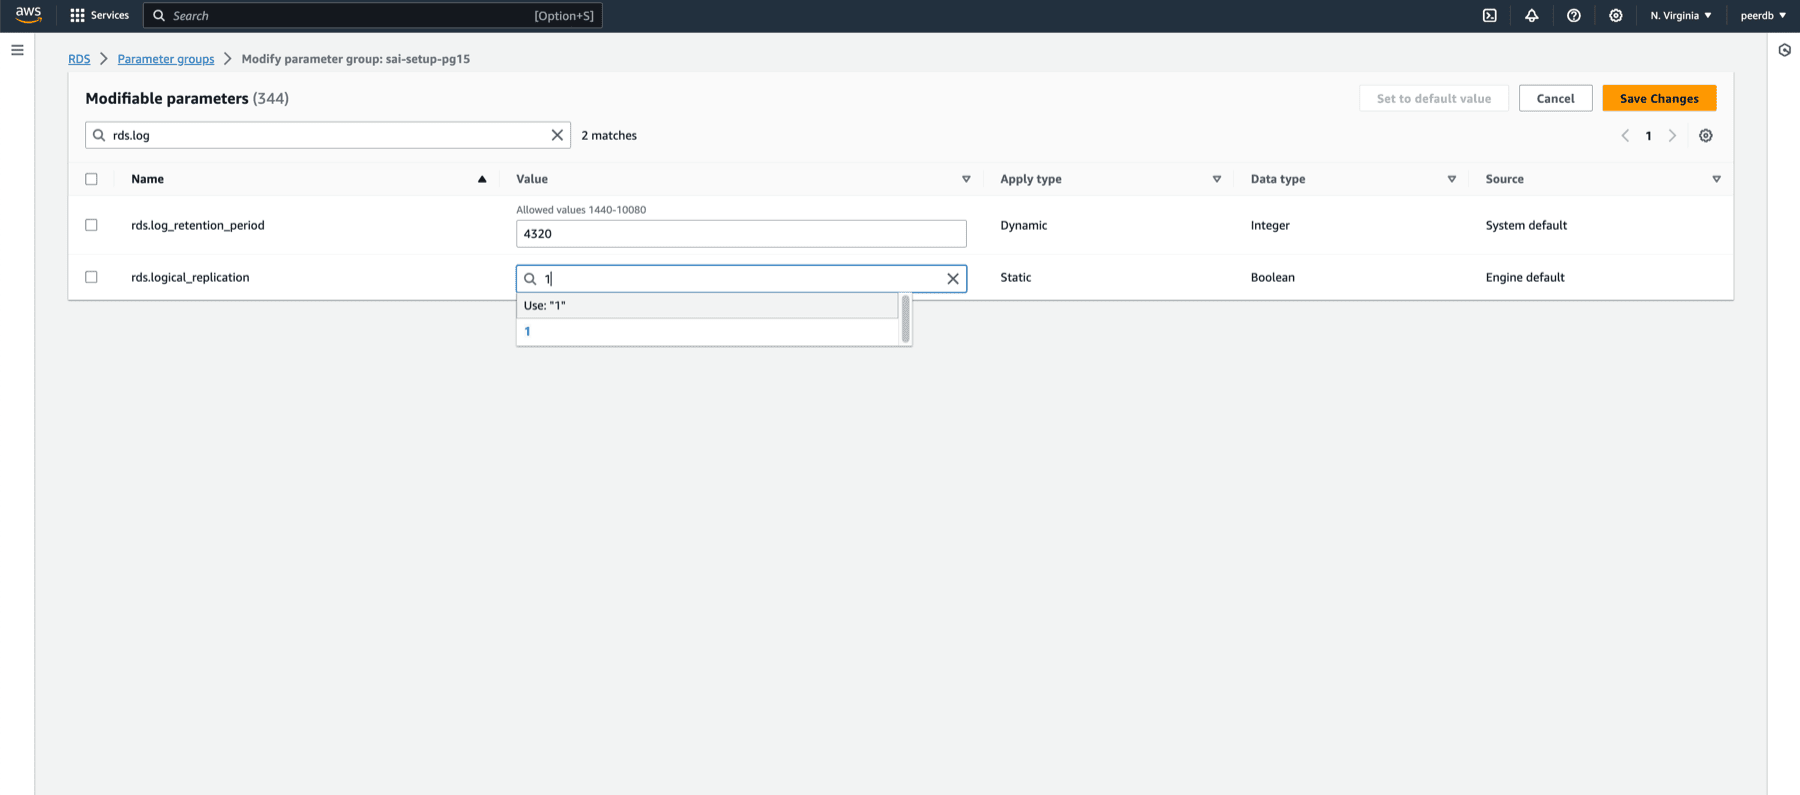
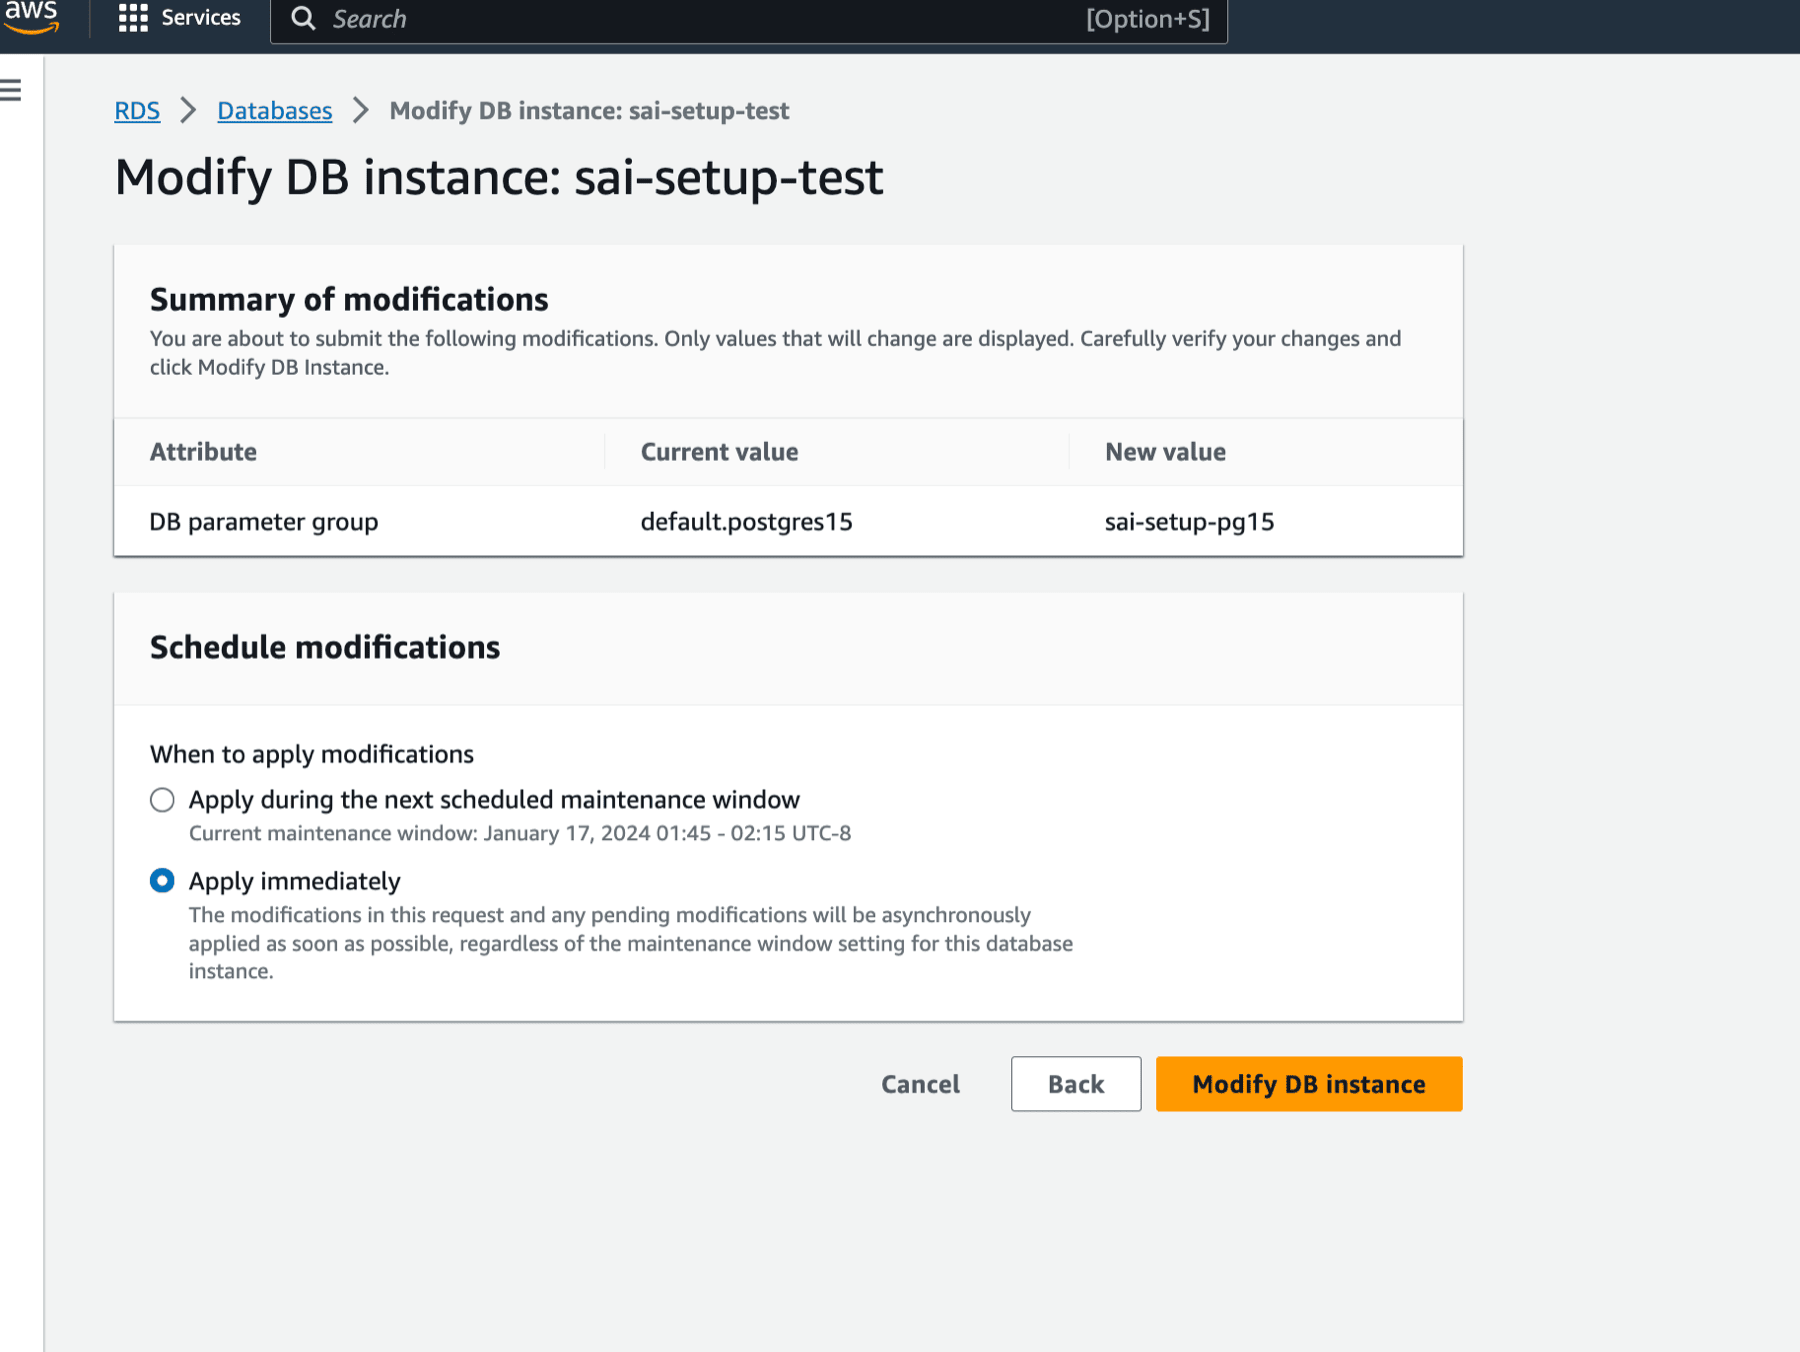
- 新しいパラメータグループを Aurora PostgreSQL クラスターに適用します
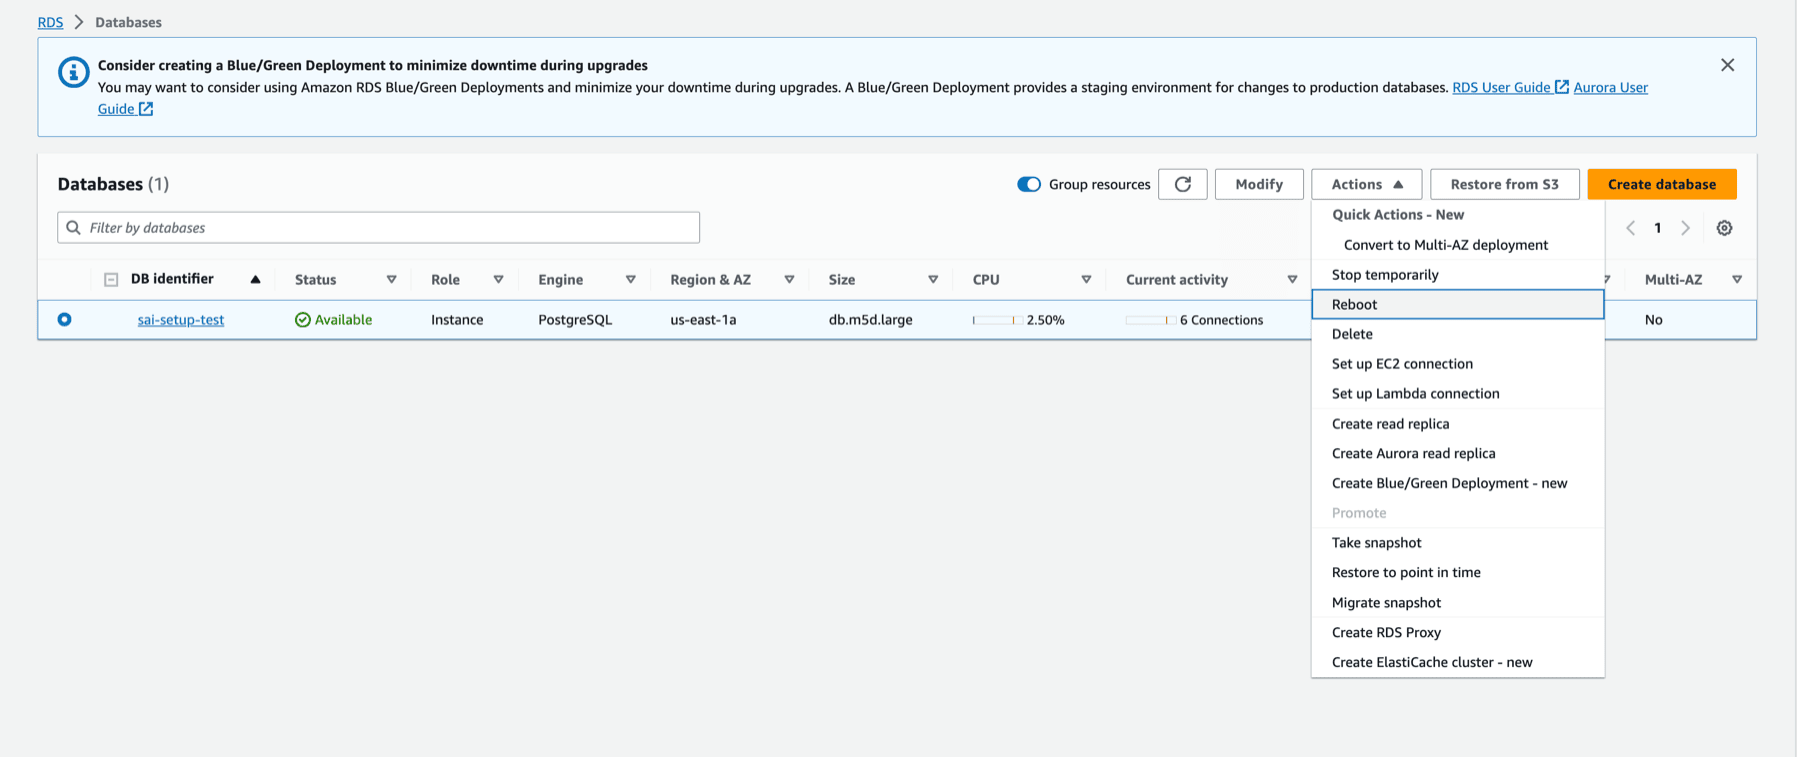
- 変更を反映するため、Aurora クラスターを再起動します
データベースユーザーを設定する
管理者ユーザーとして Aurora PostgreSQL の writer インスタンスに接続し、次のコマンドを実行します。
-
ClickPipes 専用のユーザーを作成します。
CREATE USER clickpipes_user PASSWORD 'some-password'; -
前の手順で作成したユーザーに、スキーマレベルの読み取り専用アクセス権を付与します。以下の例は
publicスキーマに対する権限を示しています。レプリケーションしたいテーブルを含む各スキーマについて、これらのコマンドを繰り返してください。GRANT USAGE ON SCHEMA "public" TO clickpipes_user; GRANT SELECT ON ALL TABLES IN SCHEMA "public" TO clickpipes_user; ALTER DEFAULT PRIVILEGES IN SCHEMA "public" GRANT SELECT ON TABLES TO clickpipes_user; -
ユーザーにレプリケーション権限を付与します。
GRANT rds_replication TO clickpipes_user; -
レプリケーションしたいテーブルを含む publication を作成します。パフォーマンスのオーバーヘッドを避けるため、publication には必要なテーブルだけを含めることを強く推奨します。
-
特定のテーブルに対する publication を作成するには:
CREATE PUBLICATION clickpipes FOR TABLE table_to_replicate, table_to_replicate2;-
特定のスキーマ内のすべてのテーブルに対する publication を作成するには:
CREATE PUBLICATION clickpipes FOR TABLES IN SCHEMA "public";
-
clickpipes publication は、変更イベントが ClickPipes にストリーミングされるテーブルの集合を定義します。すべてのテーブルをレプリケーションする予定でない限り、FOR ALL TABLES は使用しないことを推奨します。不要なテーブルを含めると、Postgres から ClickPipes への WAL トラフィックが増加し、レプリケーション全体の効率が低下するためです。
IAM authentication を使用する (任意)
Instead of a password, you can authenticate the ClickPipes user with an AWS IAM role. This lets ClickPipes connect to your Amazon Aurora cluster without storing database credentials.
Enable IAM authentication
- Log in to your AWS account and go to the Aurora cluster you want to configure.
- Click Modify.
- Scroll to the Database authentication section.
- Select Password and IAM database authentication.
- Click Continue.
- Review the changes and select Apply immediately.
Create the ClickPipes user
Create the ClickPipes user with IAM authentication enabled, then grant it the same schema and replication privileges shown above:
CREATE USER clickpipes_iam_user;
GRANT rds_iam TO clickpipes_iam_user;Obtain the ClickHouse service IAM role ARN
- Log in to your ClickHouse Cloud account.
- Select the ClickHouse service you want to connect.
- Select the Settings tab.
- Scroll to the Network security information section at the bottom of the page.
- Copy the service's Service role ID (IAM) value, shown below.
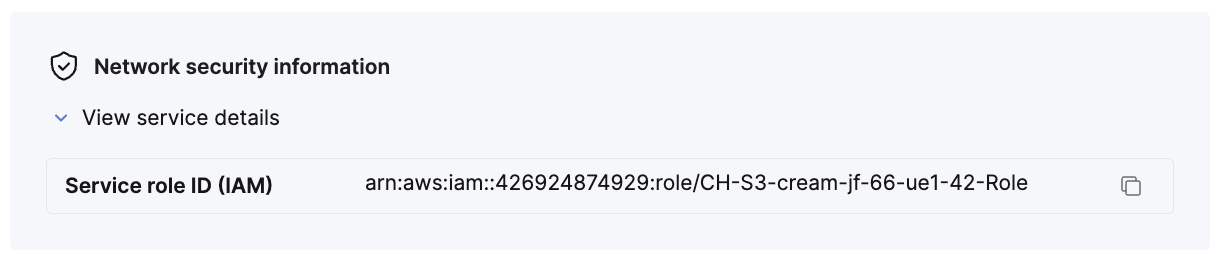
This value is your {ClickHouse_IAM_ARN} — the role ClickPipes uses to access your Aurora cluster.
Obtain the resource ID
- Log in to your AWS account and go to the Aurora cluster you want to configure.
- Select the Configuration tab.
- Note the Resource ID value — it looks like
cluster-xxxxxxxxxxxxxx. This is your{RDS_RESOURCE_ID}, which you reference in the permissions policy.
Create the IAM role
- Log in to your AWS account with an IAM user that has permission to create and manage IAM roles.
- Open the IAM console.
- Create a new IAM role with the following trust and permissions policies.
Trust policy (replace
{ClickHouse_IAM_ARN}with the IAM role ARN of your ClickHouse instance):{ "Version": "2012-10-17", "Statement": [ { "Effect": "Allow", "Principal": { "AWS": "{ClickHouse_IAM_ARN}" }, "Action": [ "sts:AssumeRole", "sts:TagSession" ] } ] }Permissions policy (replace
{RDS_RESOURCE_ID}with the resource ID of your Aurora cluster,{RDS_REGION}with its region, and{AWS_ACCOUNT}with your AWS account ID):{ "Version": "2012-10-17", "Statement": [ { "Effect": "Allow", "Action": [ "rds-db:connect" ], "Resource": [ "arn:aws:rds-db:{RDS_REGION}:{AWS_ACCOUNT}:dbuser:{RDS_RESOURCE_ID}/clickpipes_iam_user" ] } ] } - Once the role is created, copy its ARN. This is your
{RDS_ACCESS_IAM_ROLE_ARN}.
You can now use this IAM role to authenticate with your Aurora cluster from ClickPipes.
ネットワークアクセスの設定
IP ベースのアクセス制御
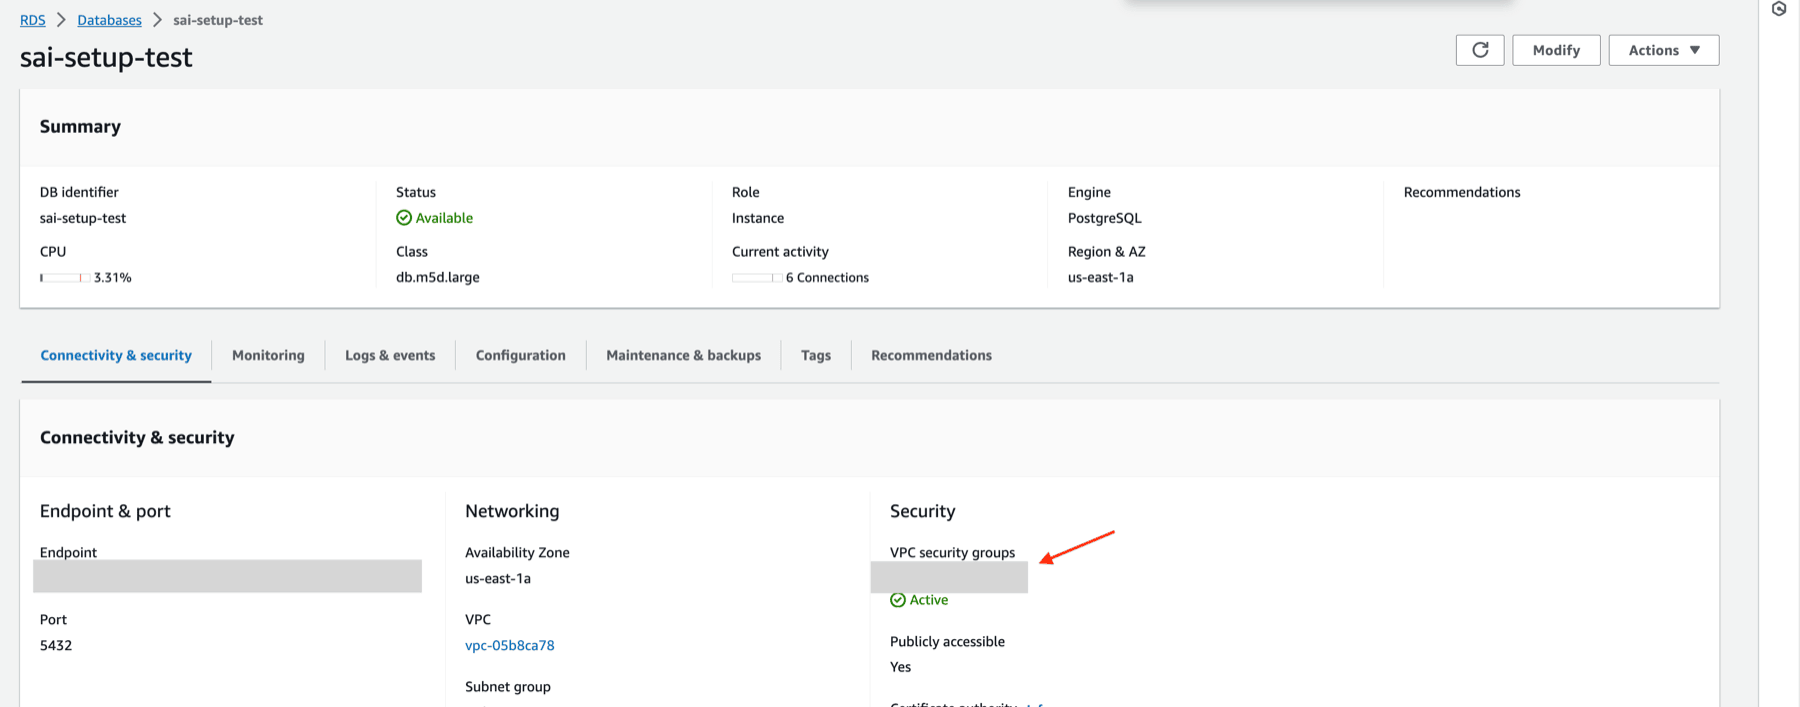
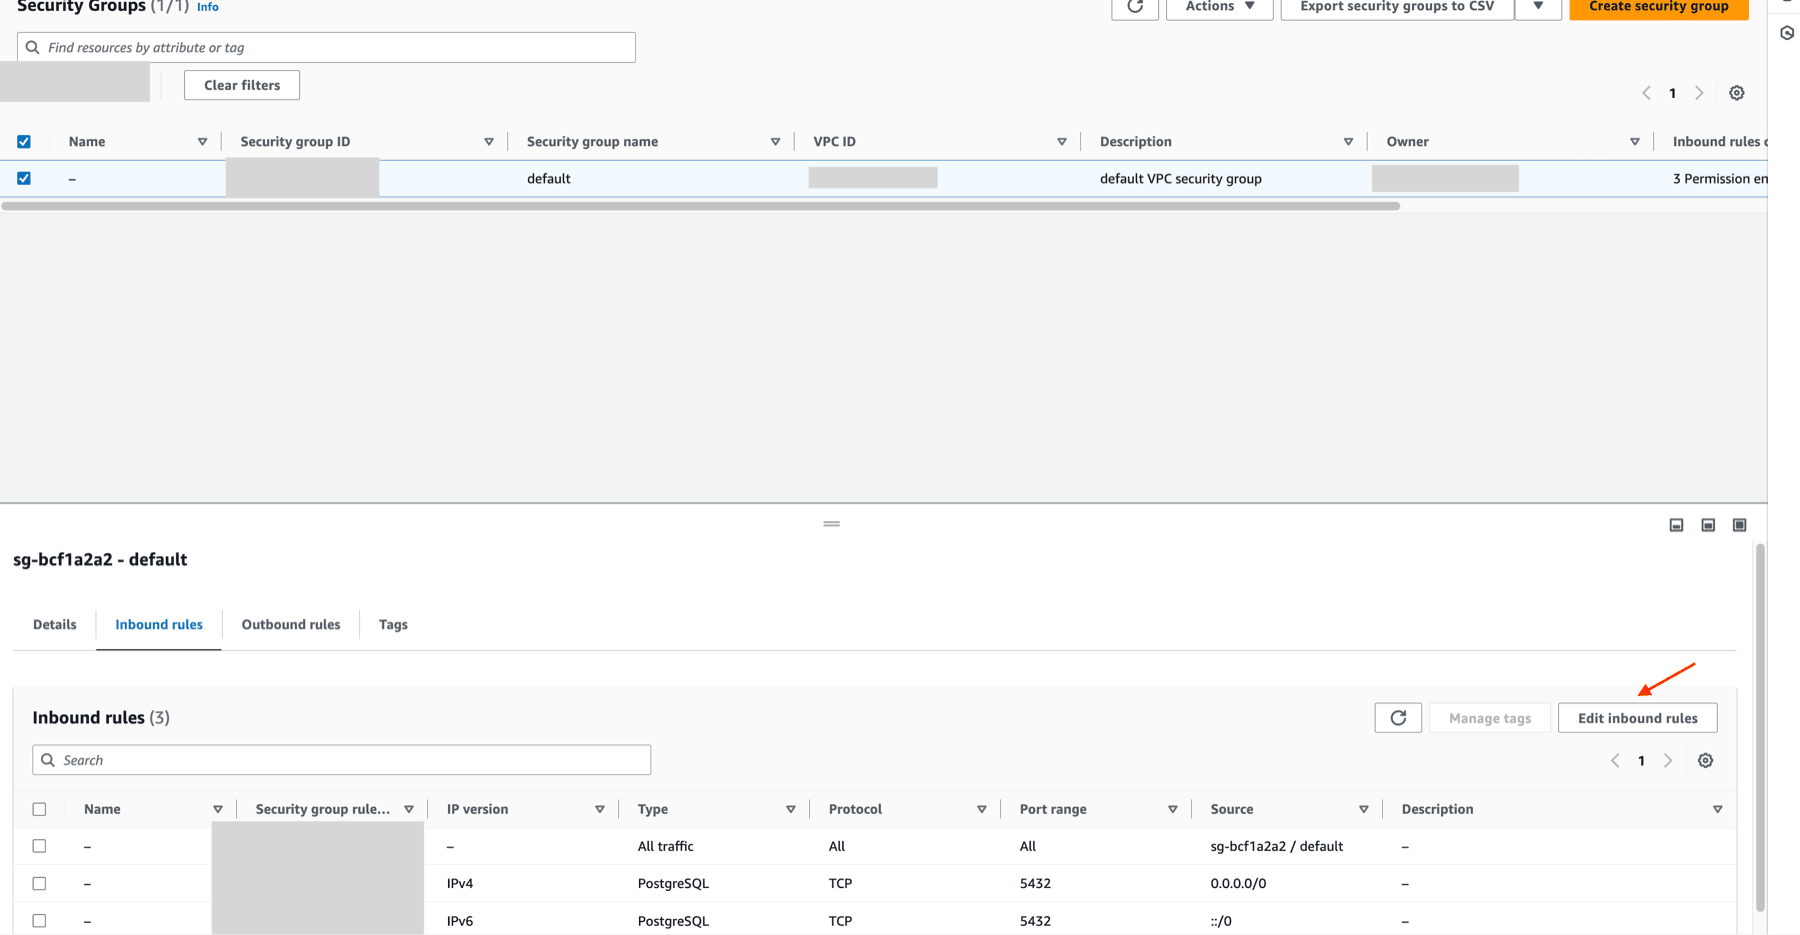
Aurora クラスターへのトラフィックを制限する場合は、ドキュメントに記載されている固定 NAT IP を Aurora のセキュリティグループの Inbound rules に追加してください。
AWS PrivateLink 経由のプライベートアクセス
プライベートネットワーク経由で Aurora クラスターに接続するには、AWS PrivateLink を利用できます。接続の設定については、ClickPipes 向け AWS PrivateLink セットアップガイドを参照してください。
Aurora 固有の考慮事項
Aurora PostgreSQL で ClickPipes を設定する際は、以下の点に注意してください。
-
接続エンドポイント: 論理レプリケーションでは、レプリケーションスロットを作成するための書き込み権限が必要であり、プライマリインスタンスに接続しなければならないため、必ず Aurora クラスターの writer エンドポイントに接続してください。
-
フェイルオーバー時の動作: フェイルオーバーが発生すると、Aurora は自動的に reader を昇格させ、新しい writer にします。ClickPipes は切断を検知すると writer エンドポイントへの再接続を試み、そのエンドポイントは新しいプライマリインスタンスを指すようになります。
-
Global Database: Aurora Global Database を使用している場合は、リージョン間のデータ移動はクロスリージョンレプリケーションですでに処理されるため、プライマリ Region の writer エンドポイントに接続してください。
-
ストレージに関する考慮事項: Aurora のストレージ層はクラスター内のすべてのインスタンスで共有されるため、標準の RDS と比べて論理レプリケーションのパフォーマンスが向上する場合があります。
動的なクラスターエンドポイントへの対処
Aurora は適切なインスタンスに自動的にルーティングされる安定したエンドポイントを提供しますが、接続先を一貫して維持するために、さらに以下の方法も検討できます。
-
高可用性構成では、現在のプライマリインスタンスを自動的に指す Aurora writer エンドポイント を使用するようにアプリケーションを設定してください。
-
クロスリージョンレプリケーションを使用している場合は、レイテンシを低減し、耐障害性を高めるために、リージョンごとに個別の ClickPipes を設定することを検討してください。
次のステップ
これで、ClickPipeを作成し、Aurora PostgreSQL クラスターから ClickHouse Cloud へのデータの取り込みを開始できます。 ClickPipe の作成時に必要になるため、Aurora PostgreSQL クラスターの設定時に使用した接続情報は必ず控えておいてください。