

 Set up docs MCP
支持的 Postgres 版本
ClickPipes 支持 Postgres 12 及以上版本。
启用逻辑复制
如果您的 RDS 实例已经配置了以下设置,则可以跳过本节:
rds.logical_replication = 1
如果您之前使用过其他数据复制工具,通常会已预先配置好此设置。
postgres=> SHOW rds.logical_replication ;
 rds.logical_replication
-------------------------
 on
(1 row)
如果尚未配置,请按以下步骤操作:
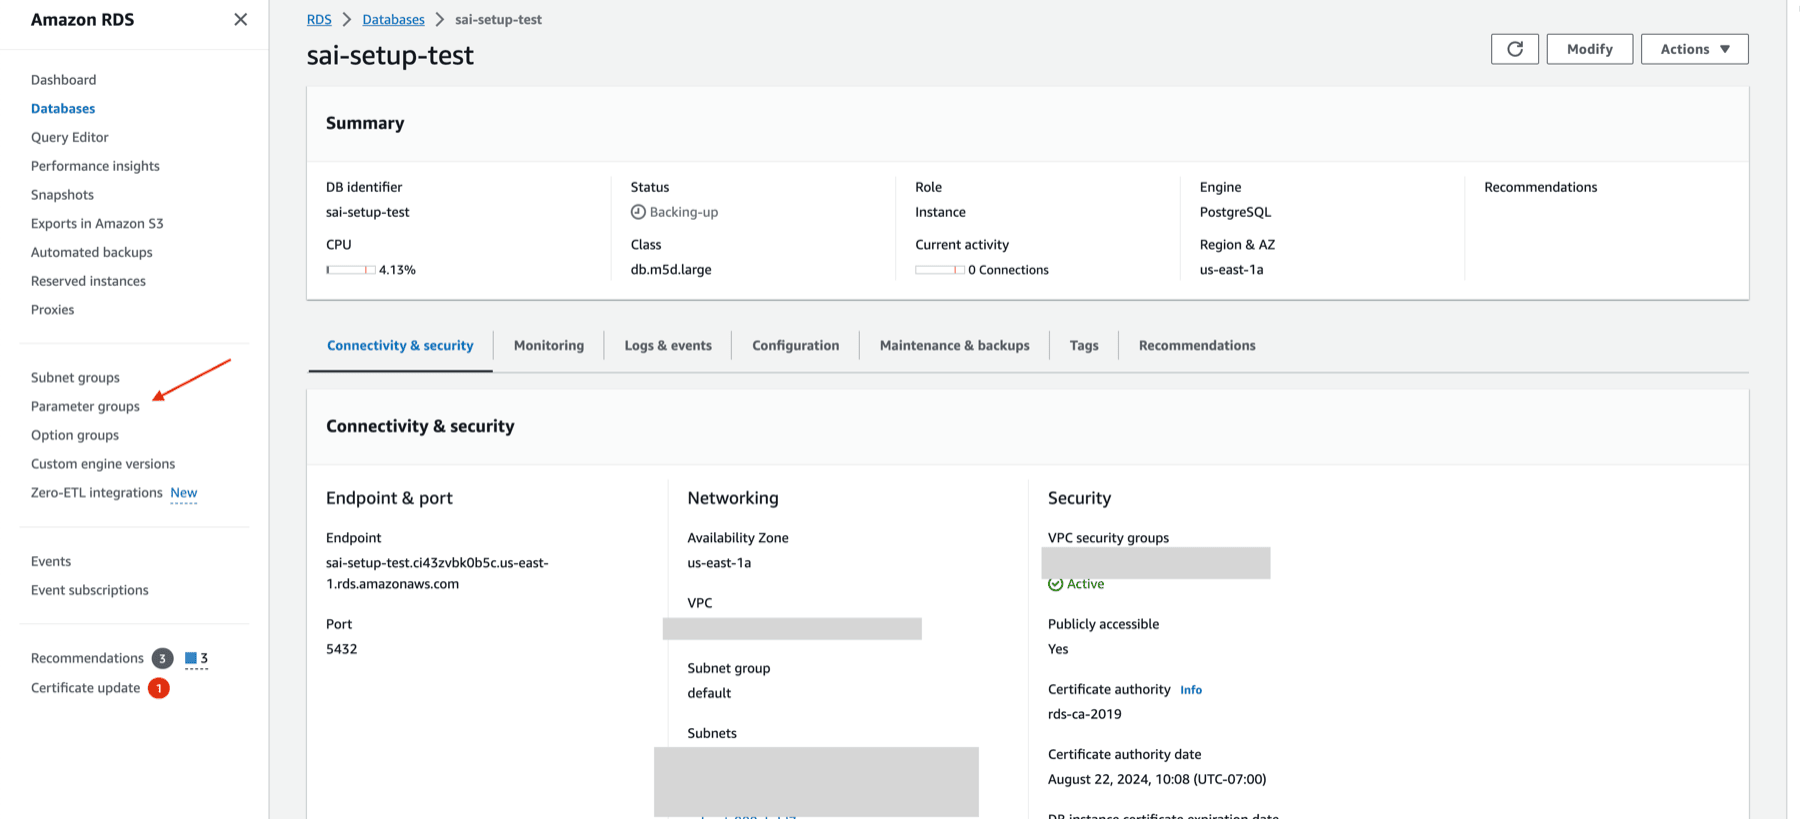
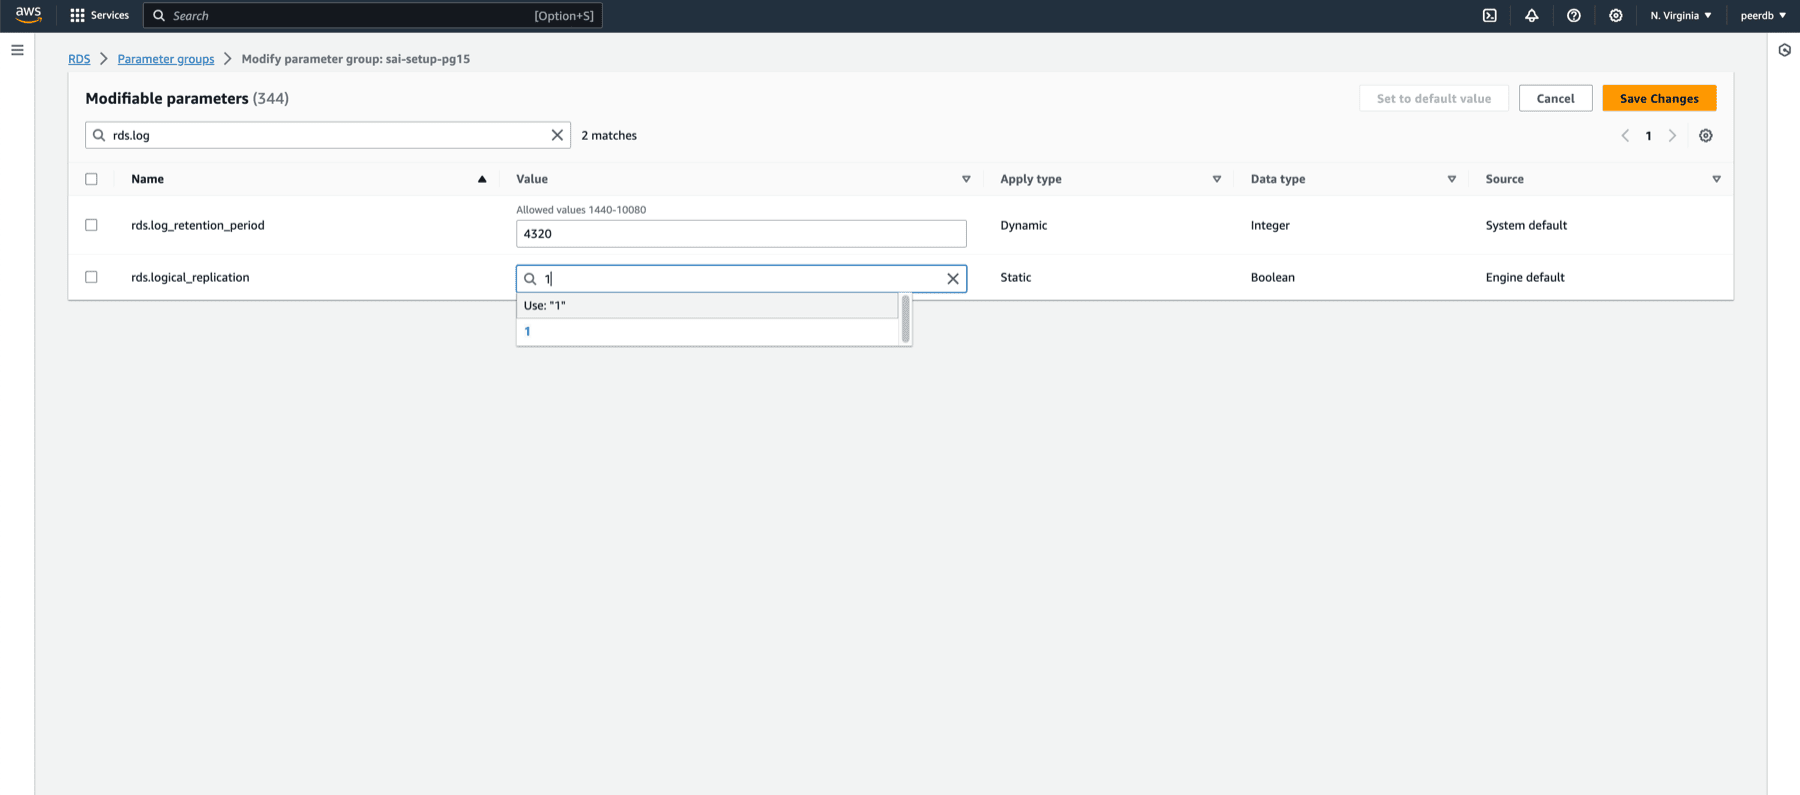
- 为你的 Postgres 版本创建一个包含所需设置的新参数组:
- 将
rds.logical_replication设置为 1
- 将
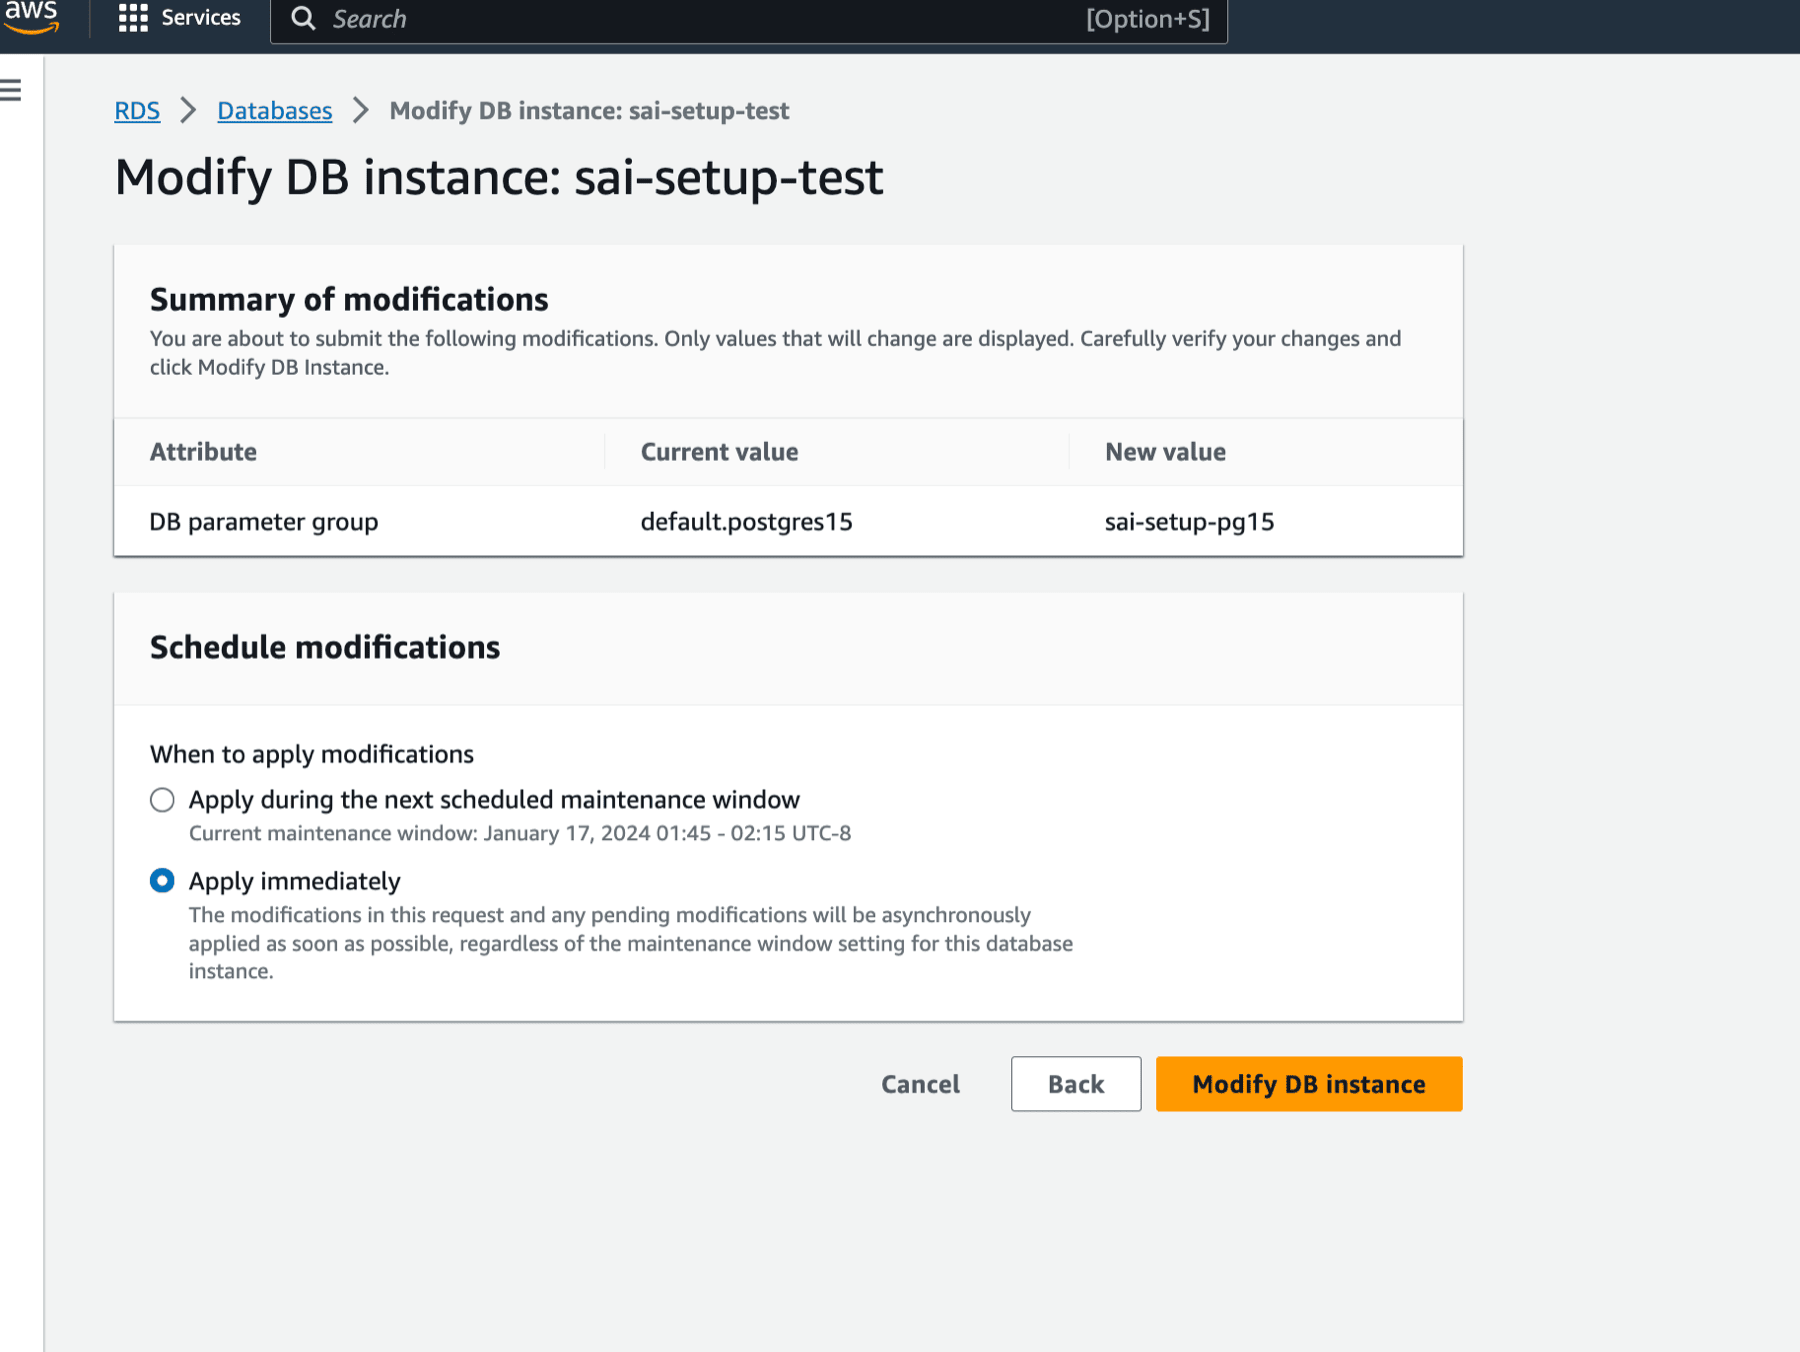
- 将新参数组应用到你的 RDS Postgres 数据库
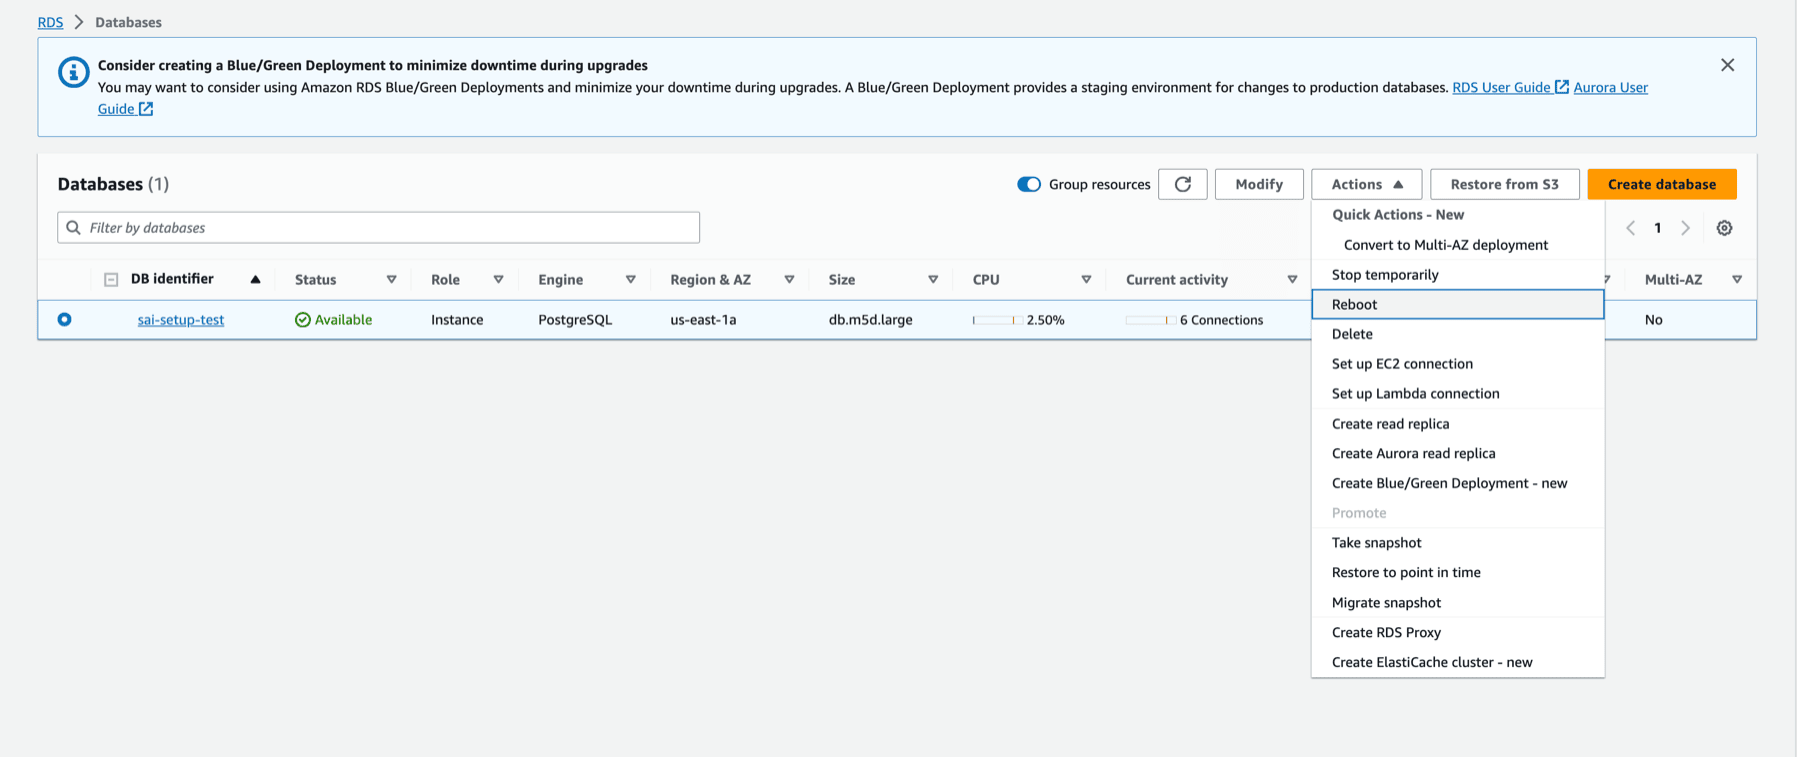
- 重启你的 RDS 实例以使更改生效
配置数据库用户
使用管理员用户连接到你的 RDS Postgres 实例,并执行以下命令:
-
为 ClickPipes 创建一个专用用户:
CREATE USER clickpipes_user PASSWORD 'some-password'; -
为上一步创建的用户授予 schema 级只读权限。以下示例展示了
publicschema 的权限。对于每个包含你要复制的表的 schema,都需要重复执行这些命令:GRANT USAGE ON SCHEMA "public" TO clickpipes_user; GRANT SELECT ON ALL TABLES IN SCHEMA "public" TO clickpipes_user; ALTER DEFAULT PRIVILEGES IN SCHEMA "public" GRANT SELECT ON TABLES TO clickpipes_user; -
向该用户授予复制特权:
GRANT rds_replication TO clickpipes_user; -
使用你要复制的表创建一个 publication。我们强烈建议只在 publication 中包含实际需要的表,以避免额外的性能开销。
-
为特定表创建 publication:
CREATE PUBLICATION clickpipes FOR TABLE table_to_replicate, table_to_replicate2;-
为特定 schema 中的所有表创建 publication:
CREATE PUBLICATION clickpipes FOR TABLES IN SCHEMA "public";
-
clickpipes publication 定义了将变更事件流式传输到 ClickPipes 的那组表。除非你打算复制每一张表,否则我们不建议使用 FOR ALL TABLES,因为包含不必要的表会增加从 Postgres 到 ClickPipes 的 WAL 流量,并降低整体复制效率。
使用 IAM 身份验证 (可选)
Instead of a password, you can authenticate the ClickPipes user with an AWS IAM role. This lets ClickPipes connect to your Amazon RDS instance without storing database credentials.
Enable IAM authentication
- Log in to your AWS account and go to the RDS instance you want to configure.
- Click Modify.
- Scroll to the Database authentication section.
- Select Password and IAM database authentication.
- Click Continue.
- Review the changes and select Apply immediately.
Create the ClickPipes user
Create the ClickPipes user with IAM authentication enabled, then grant it the same schema and replication privileges shown above:
CREATE USER clickpipes_iam_user;
GRANT rds_iam TO clickpipes_iam_user;Obtain the ClickHouse service IAM role ARN
- Log in to your ClickHouse Cloud account.
- Select the ClickHouse service you want to connect.
- Select the Settings tab.
- Scroll to the Network security information section at the bottom of the page.
- Copy the service's Service role ID (IAM) value, shown below.
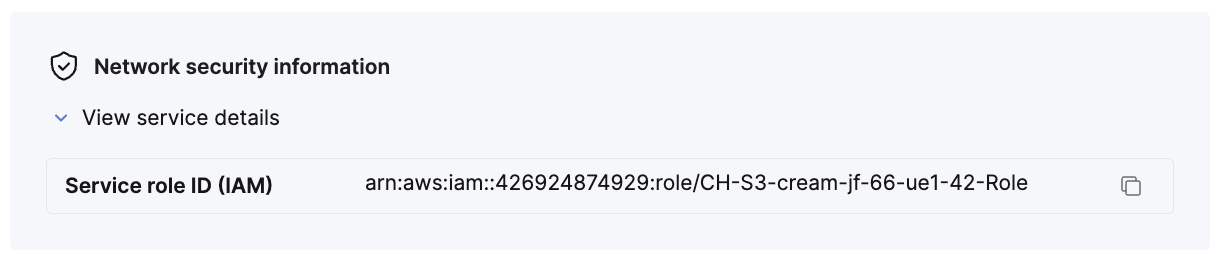
This value is your {ClickHouse_IAM_ARN} — the role ClickPipes uses to access your RDS instance.
Obtain the resource ID
- Log in to your AWS account and go to the RDS instance you want to configure.
- Select the Configuration tab.
- Note the Resource ID value — it looks like
db-xxxxxxxxxxxxxx. This is your{RDS_RESOURCE_ID}, which you reference in the permissions policy.
Create the IAM role
- Log in to your AWS account with an IAM user that has permission to create and manage IAM roles.
- Open the IAM console.
- Create a new IAM role with the following trust and permissions policies.
Trust policy (replace
{ClickHouse_IAM_ARN}with the IAM role ARN of your ClickHouse instance):{ "Version": "2012-10-17", "Statement": [ { "Effect": "Allow", "Principal": { "AWS": "{ClickHouse_IAM_ARN}" }, "Action": [ "sts:AssumeRole", "sts:TagSession" ] } ] }Permissions policy (replace
{RDS_RESOURCE_ID}with the resource ID of your RDS instance,{RDS_REGION}with its region, and{AWS_ACCOUNT}with your AWS account ID):{ "Version": "2012-10-17", "Statement": [ { "Effect": "Allow", "Action": [ "rds-db:connect" ], "Resource": [ "arn:aws:rds-db:{RDS_REGION}:{AWS_ACCOUNT}:dbuser:{RDS_RESOURCE_ID}/clickpipes_iam_user" ] } ] } - Once the role is created, copy its ARN. This is your
{RDS_ACCESS_IAM_ROLE_ARN}.
You can now use this IAM role to authenticate with your RDS instance from ClickPipes.
配置网络访问
基于 IP 的访问控制
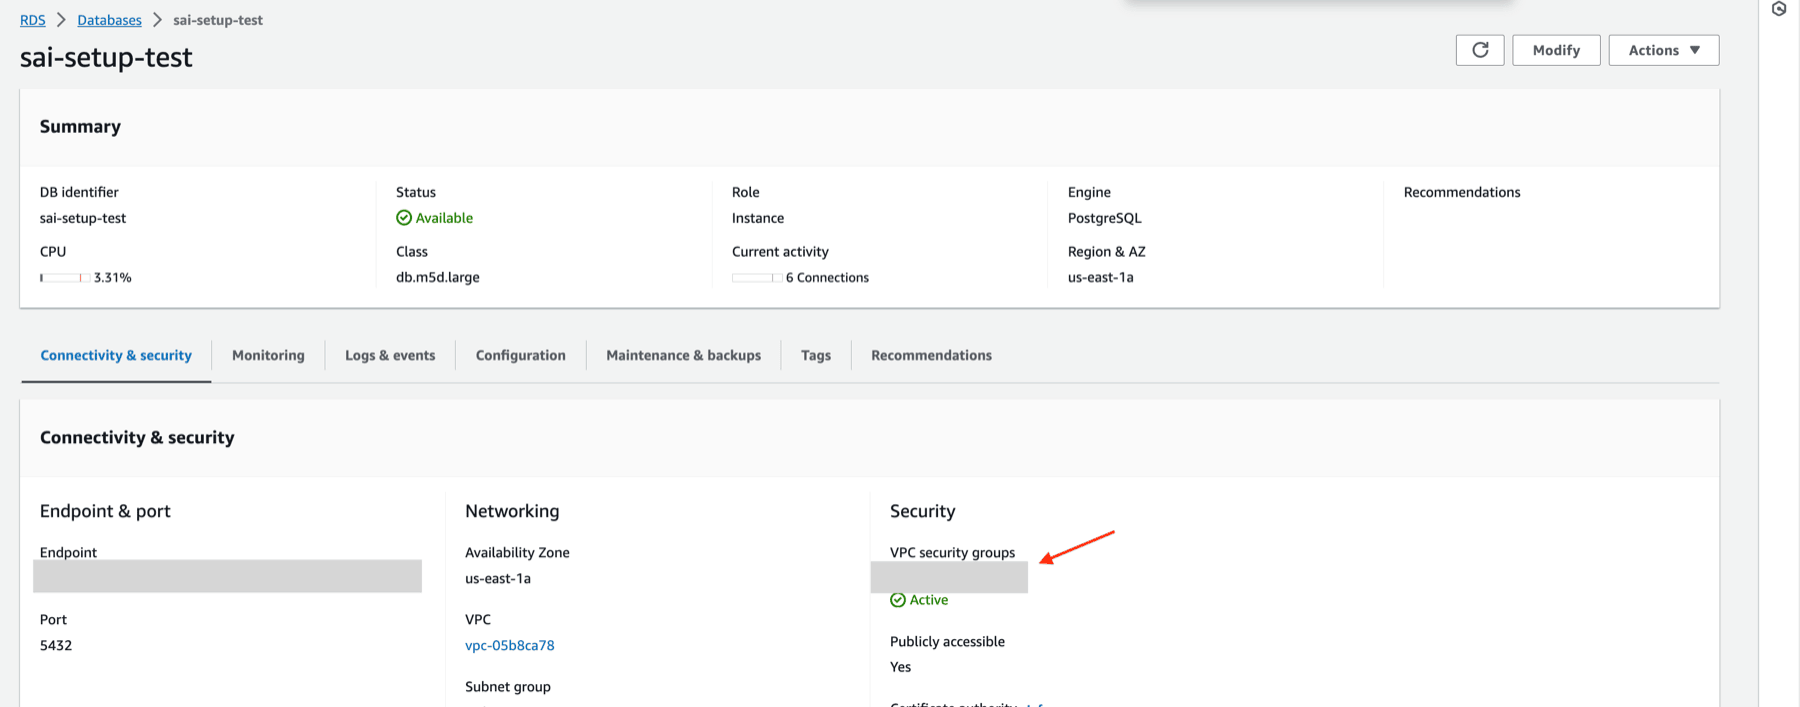
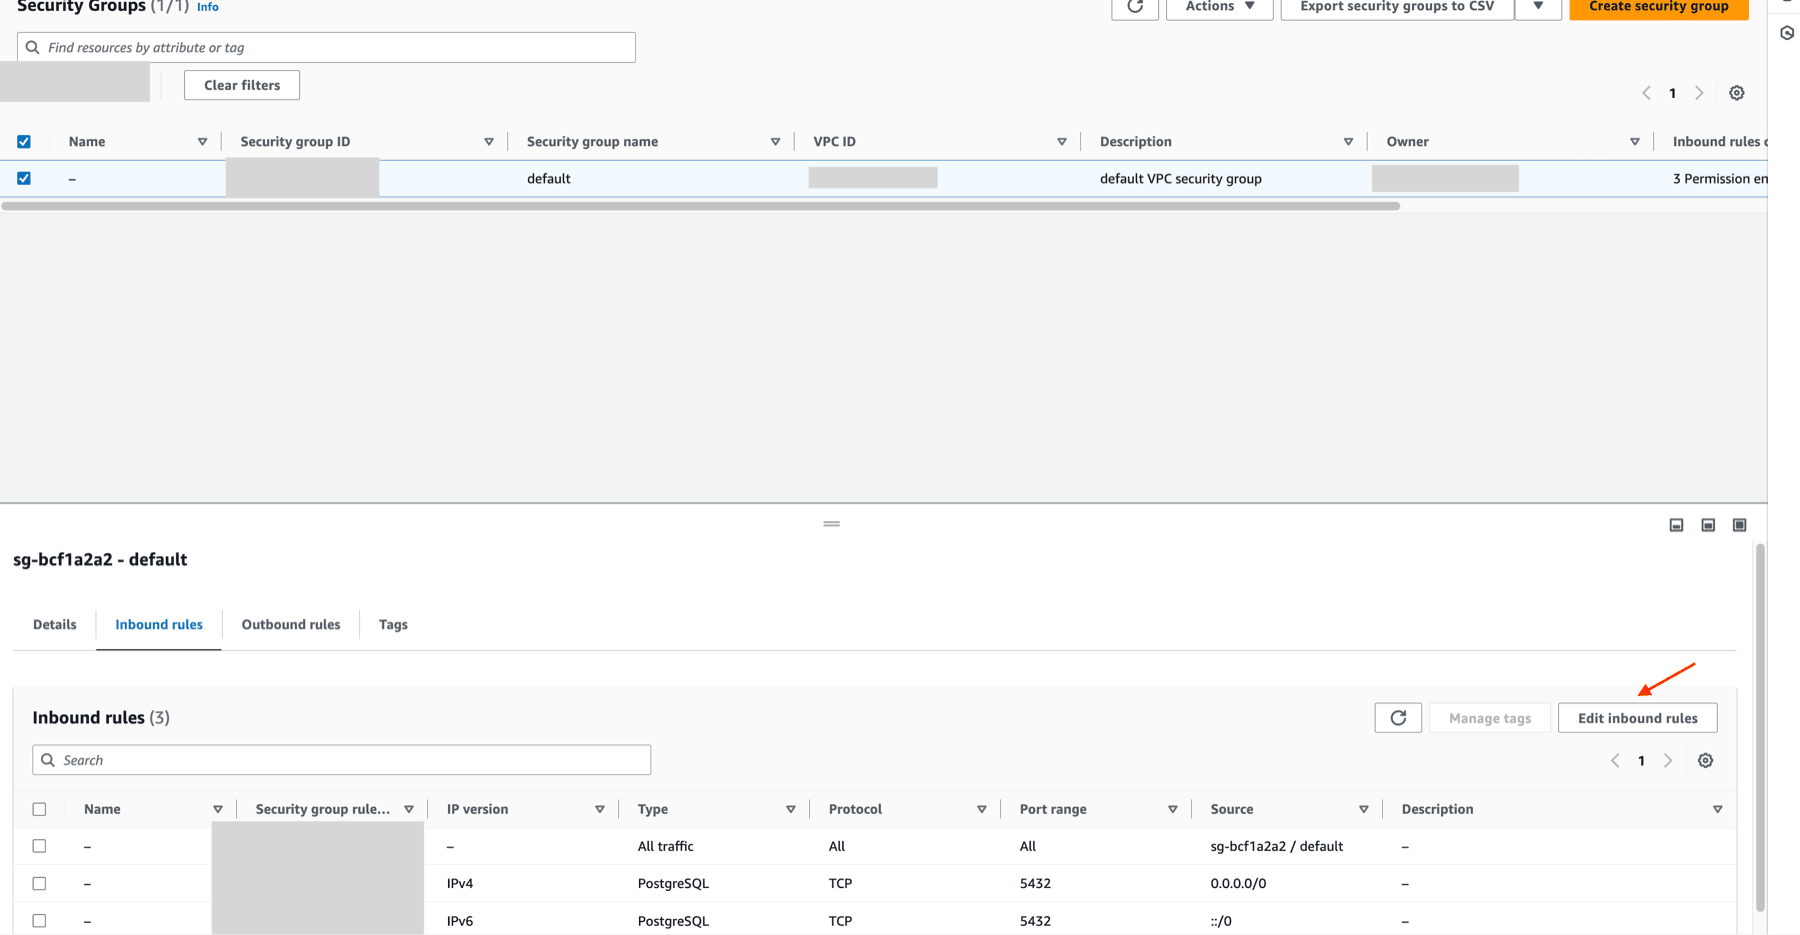
如果您想限制对 RDS 实例的访问流量,请将文档中列出的静态 NAT IP 地址添加到 RDS 安全组的 Inbound rules 中。
通过 AWS PrivateLink 进行私有访问
如需通过私有网络连接到您的 RDS 实例,可以使用 AWS PrivateLink。请参考我们的 ClickPipes AWS PrivateLink 设置指南 来完成连接设置。
RDS Proxy 的替代方案
RDS Proxy 不支持逻辑复制连接。如果你的 RDS 使用动态 IP 地址,且无法使用 DNS 名称或 Lambda,以下是一些可选方案:
- 使用 cron 作业定期解析 RDS 端点的 IP,并在 IP 发生变化时更新 NLB。
- 使用结合 EventBridge/SNS 的 RDS 事件通知:通过 AWS RDS 事件通知自动触发更新。
- 使用稳定的 EC2:部署一个 EC2 实例,充当轮询服务或基于 IP 的代理。
- 使用 Terraform 或 CloudFormation 等工具自动管理 IP 地址。
接下来呢?
你现在可以创建 ClickPipe,开始将 Postgres 实例中的数据摄取到 ClickHouse Cloud。 请务必记下设置 Postgres 实例时使用的连接信息,因为在创建 ClickPipe 的过程中会用到这些信息。